获取 Kimi 网页端对话 api,并实现后端推流
声明:本文章所授内容仅供学习。如果需要使用 Kimi Api 请在 https://platform.moonshot.cn 中申请官方正规渠道的 API。造成的一切后果,本人不承担任何责任!!!
1. 前言
本文主要分成两个部分,第一部分是获取 Kimi 网页端对话 api,第二部分是实现后端推流。第二部分是基于 SpringBoot 实现的,如果你对 SpringBoot 不熟悉,可以先学习一下 SpringBoot 的基础知识。在第二部分中,我们会用到CompletableFuture异步编程、SseEmitter后端推流、实现回调等技术。
2. 获取 Kimi 网页端对话 api
-
打开 https://kimi.moonshot.cn/ 网站,登录你自己的账号。
-
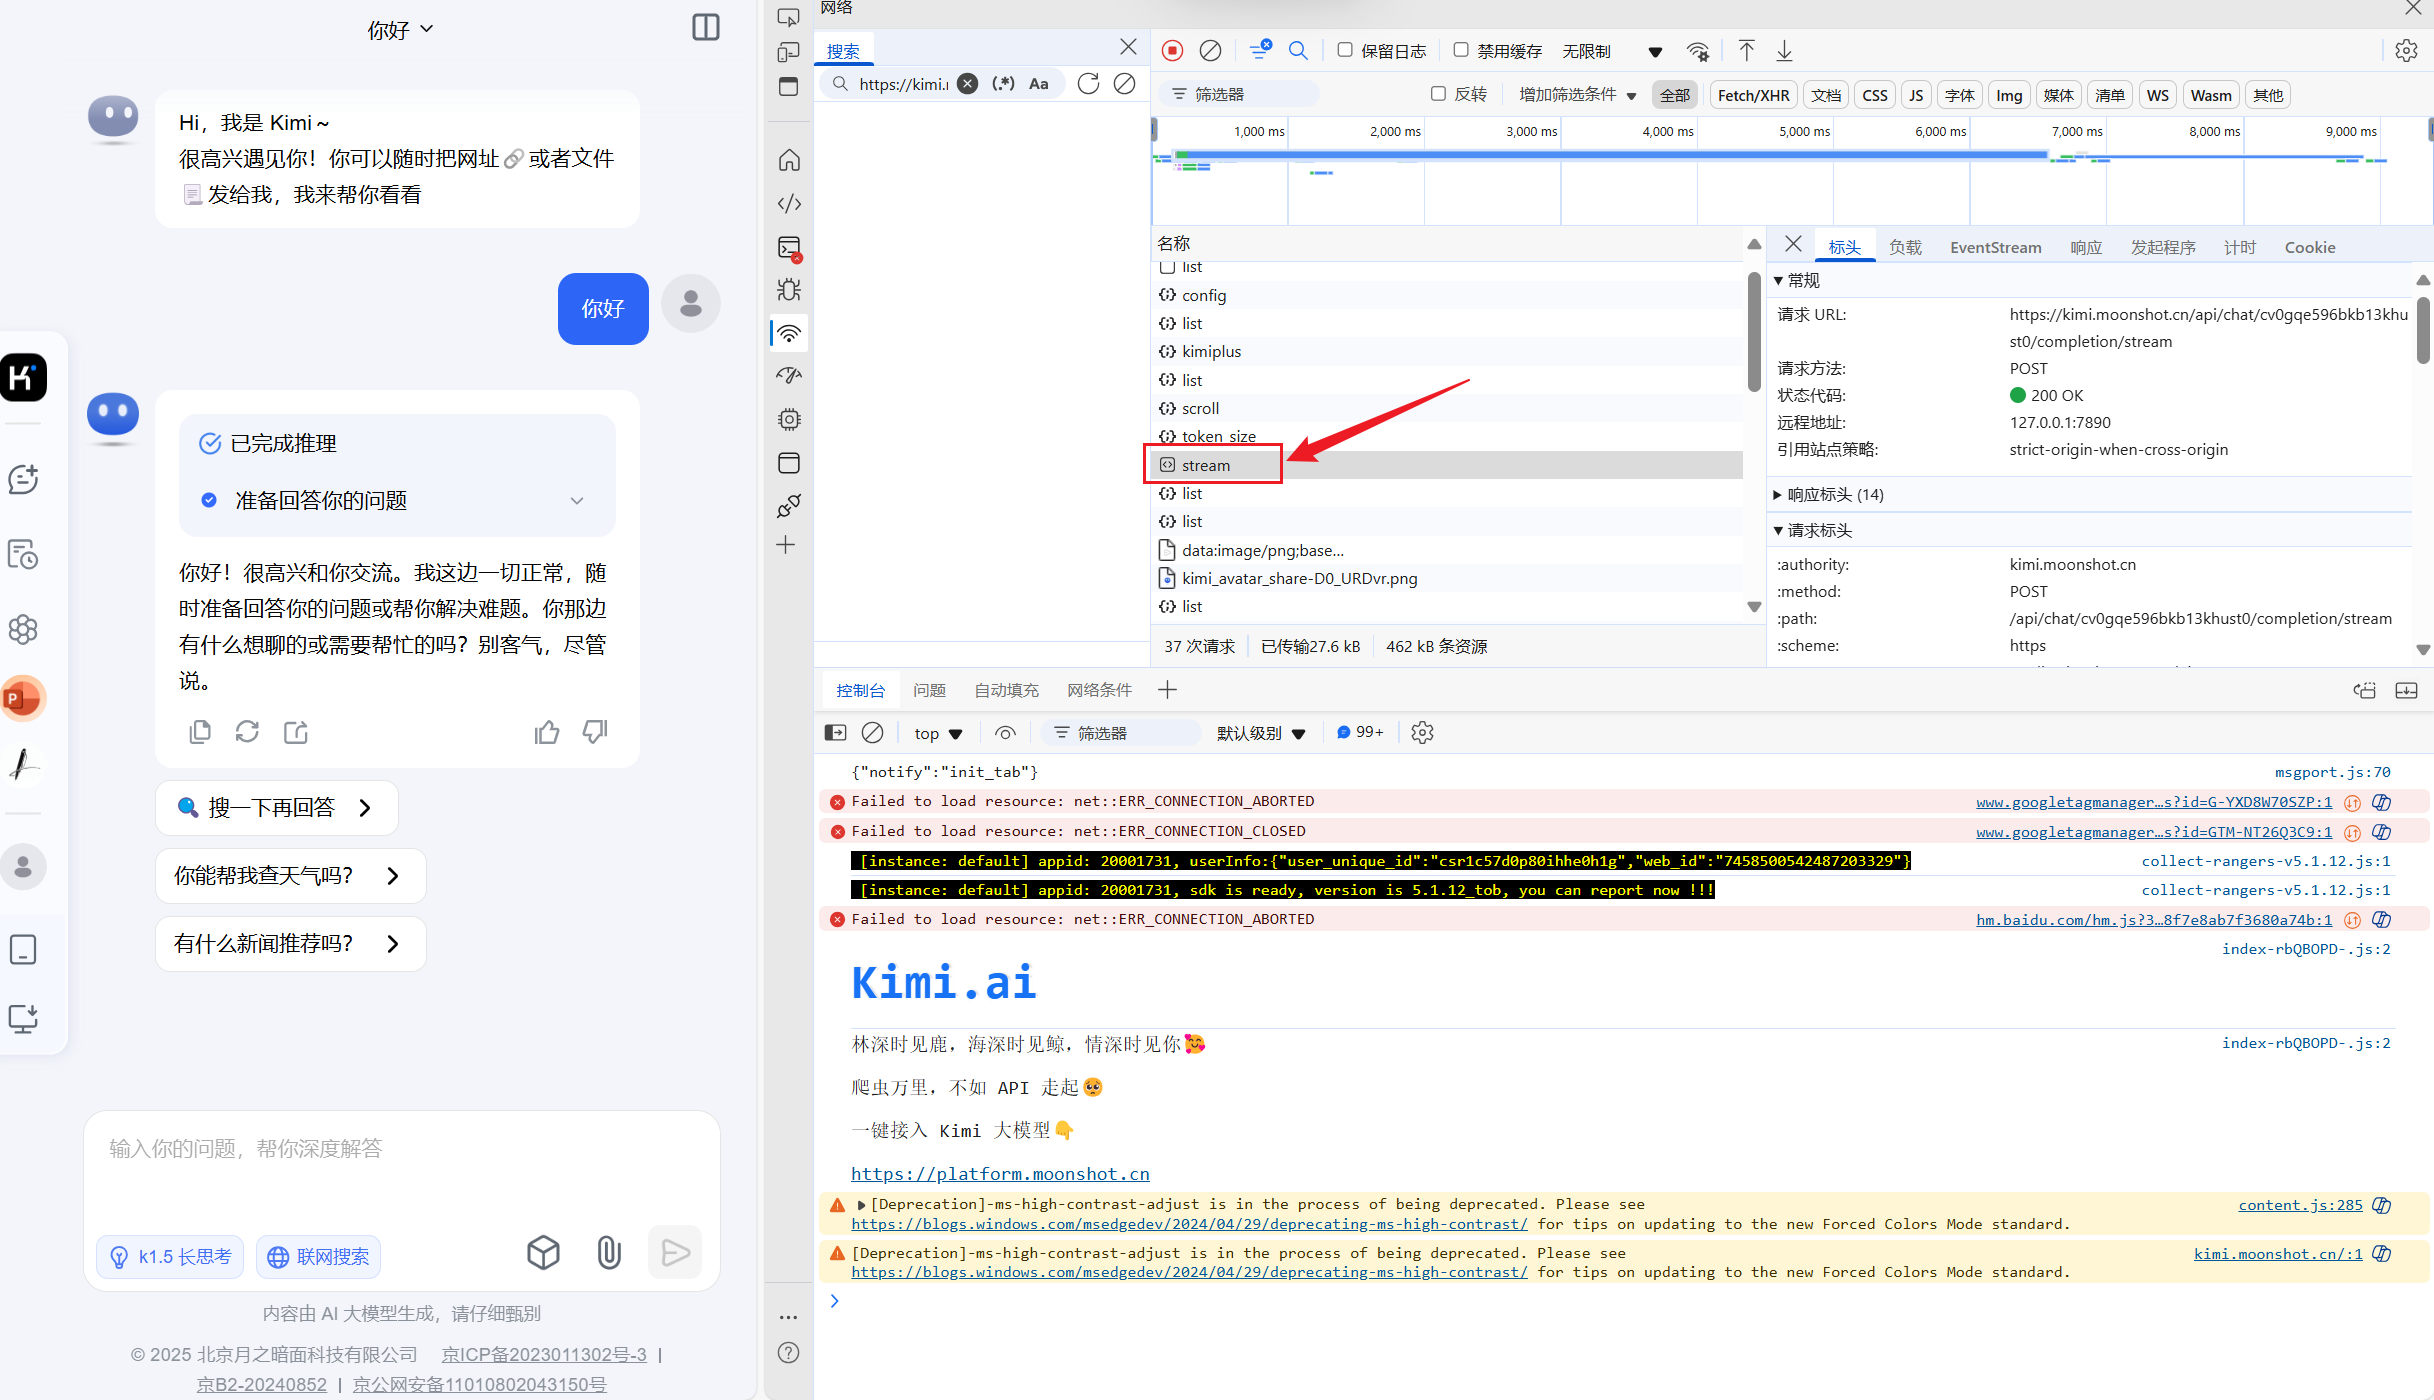
按下F12打开开发者工具,点击Network选项卡。
-
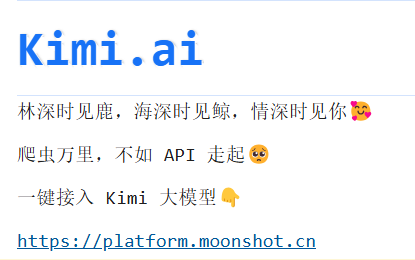
在网页上输入你想要的对话内容,比如”你好“,点击发送按钮。
-
在名称一栏里面找到stream,如图:
-
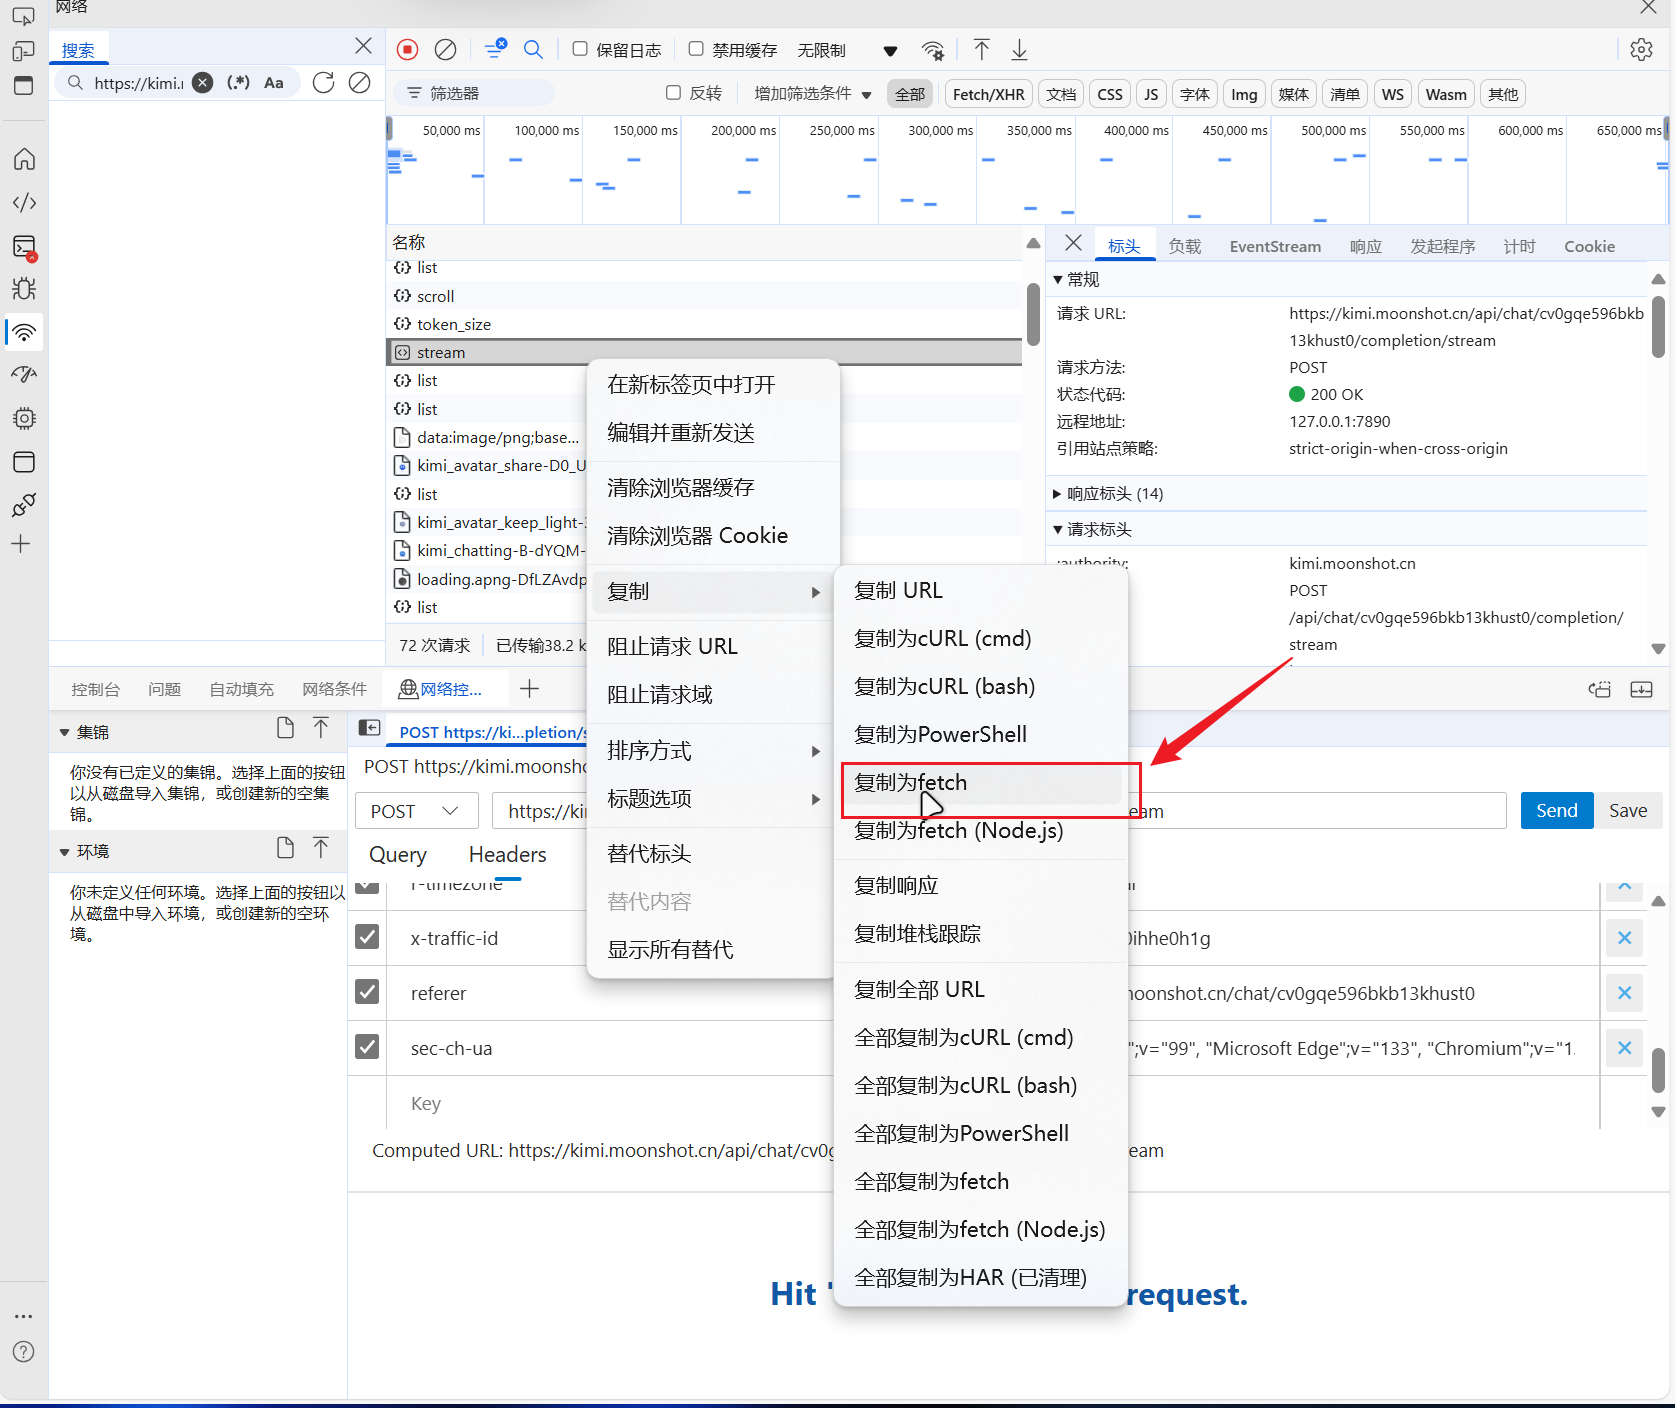
右键,点击复制,复制为fetch,如图:
-
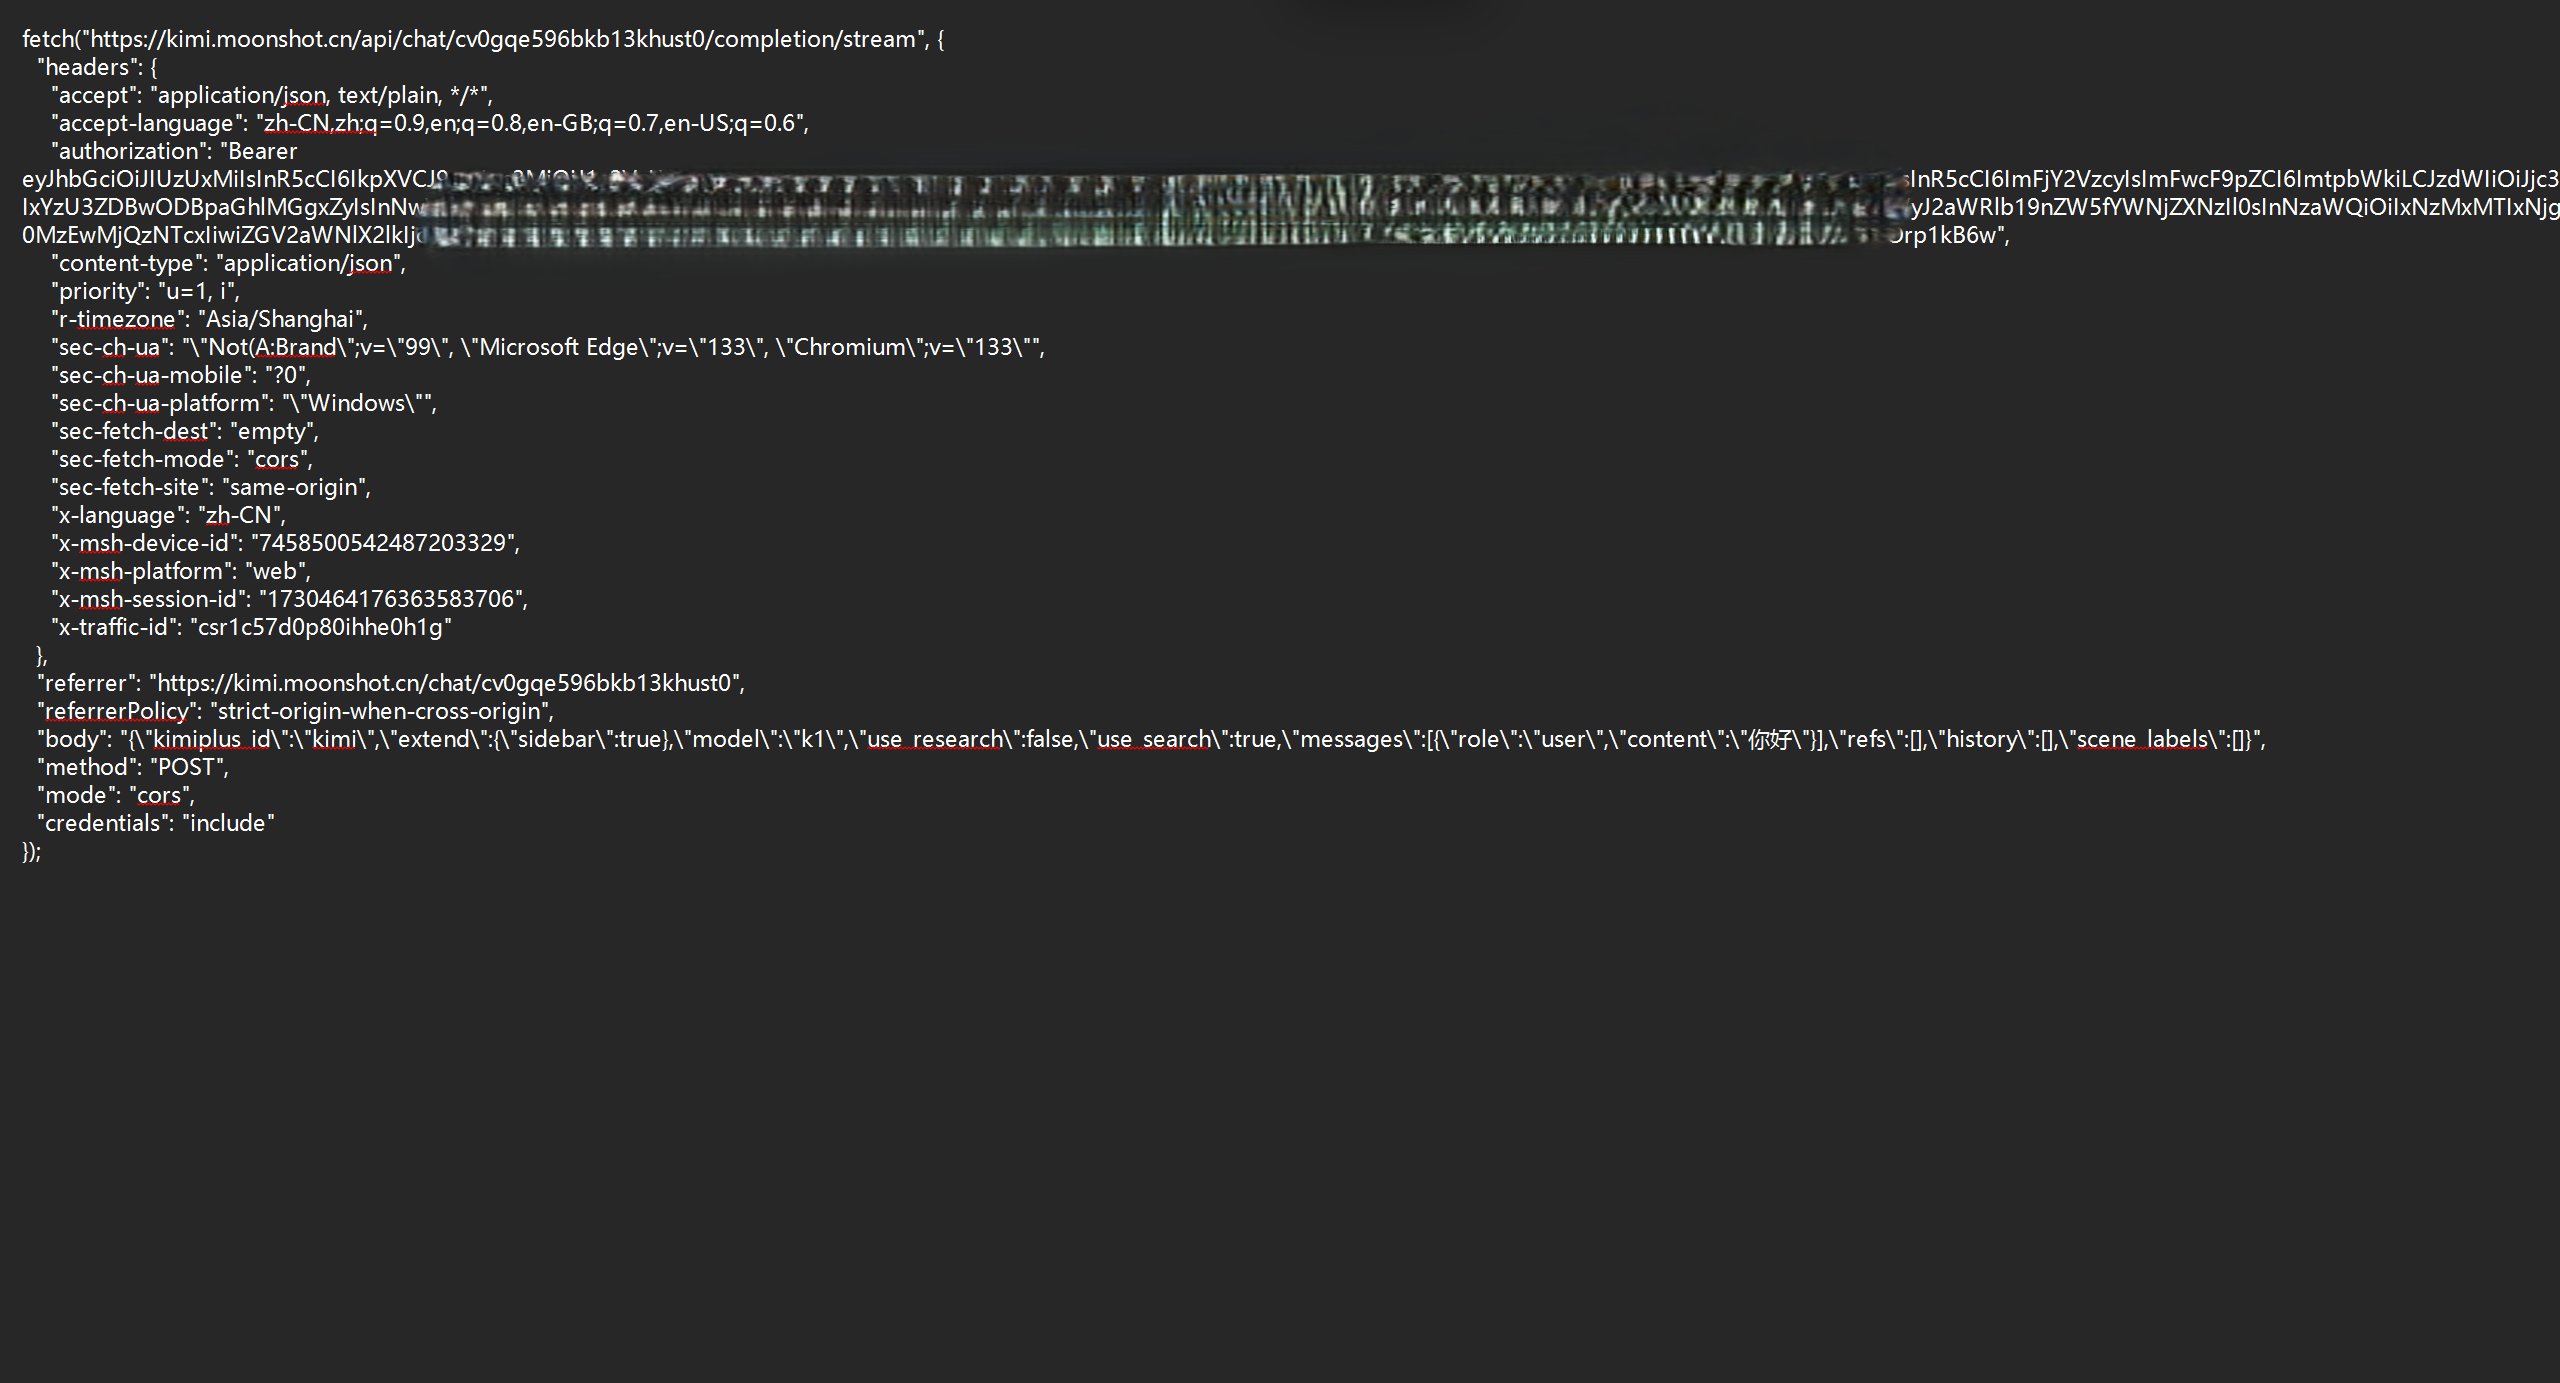
打开记事本,存储一下这个fetch请求,如图:
3. 实现后端推流
使用 IDEA 提供的 Spring Boot 生成器创建一个 SpringBoot 项目,添加依赖:
 1
 2
 3
 4
 5
 6
 7
 8
 9
10
11
12
|
        <!--fastjson依赖-->
        <dependency>
            <groupId>com.alibaba.fastjson2</groupId>
            <artifactId>fastjson2</artifactId>
            <version>2.0.56</version>
        </dependency>

        <!--okhttp依赖-->
        <dependency>
            <groupId>com.squareup.okhttp3</groupId>
            <artifactId>okhttp</artifactId>
        </dependency>
|
3.1 使用 OKhttp 向 Kimi 后端发送 api 请求
3.1.1 创建一个KimiService类
在cn.programcx.springbootinit.services包下创建一个KimiService类,并创建一个返回类型为CompletableFuture<String>的chat方法,大致框架如下:
 1
 2
 3
 4
 5
 6
 7
 8
 9
10
11
12
13
14
15
16
17
18
19
20
21
22
23
24
|
package cn.programcx.springbootinit.services;

import okhttp3.*;
import org.apache.shiro.SecurityUtils;
import org.apache.shiro.mgt.SecurityManager;
import org.springframework.beans.factory.annotation.Autowired;
import org.springframework.scheduling.annotation.Async;
import org.springframework.stereotype.Service;

import java.io.IOException;
import java.util.concurrent.CompletableFuture;

@Service
public class KimiService {

    private static final OkHttpClient client = new OkHttpClient();

    @Async
    public CompletableFuture<String> chat(String requestContent,Callback callback) throws IOException {
        {

        }
    }
}
|
3.1.2 配置请求头
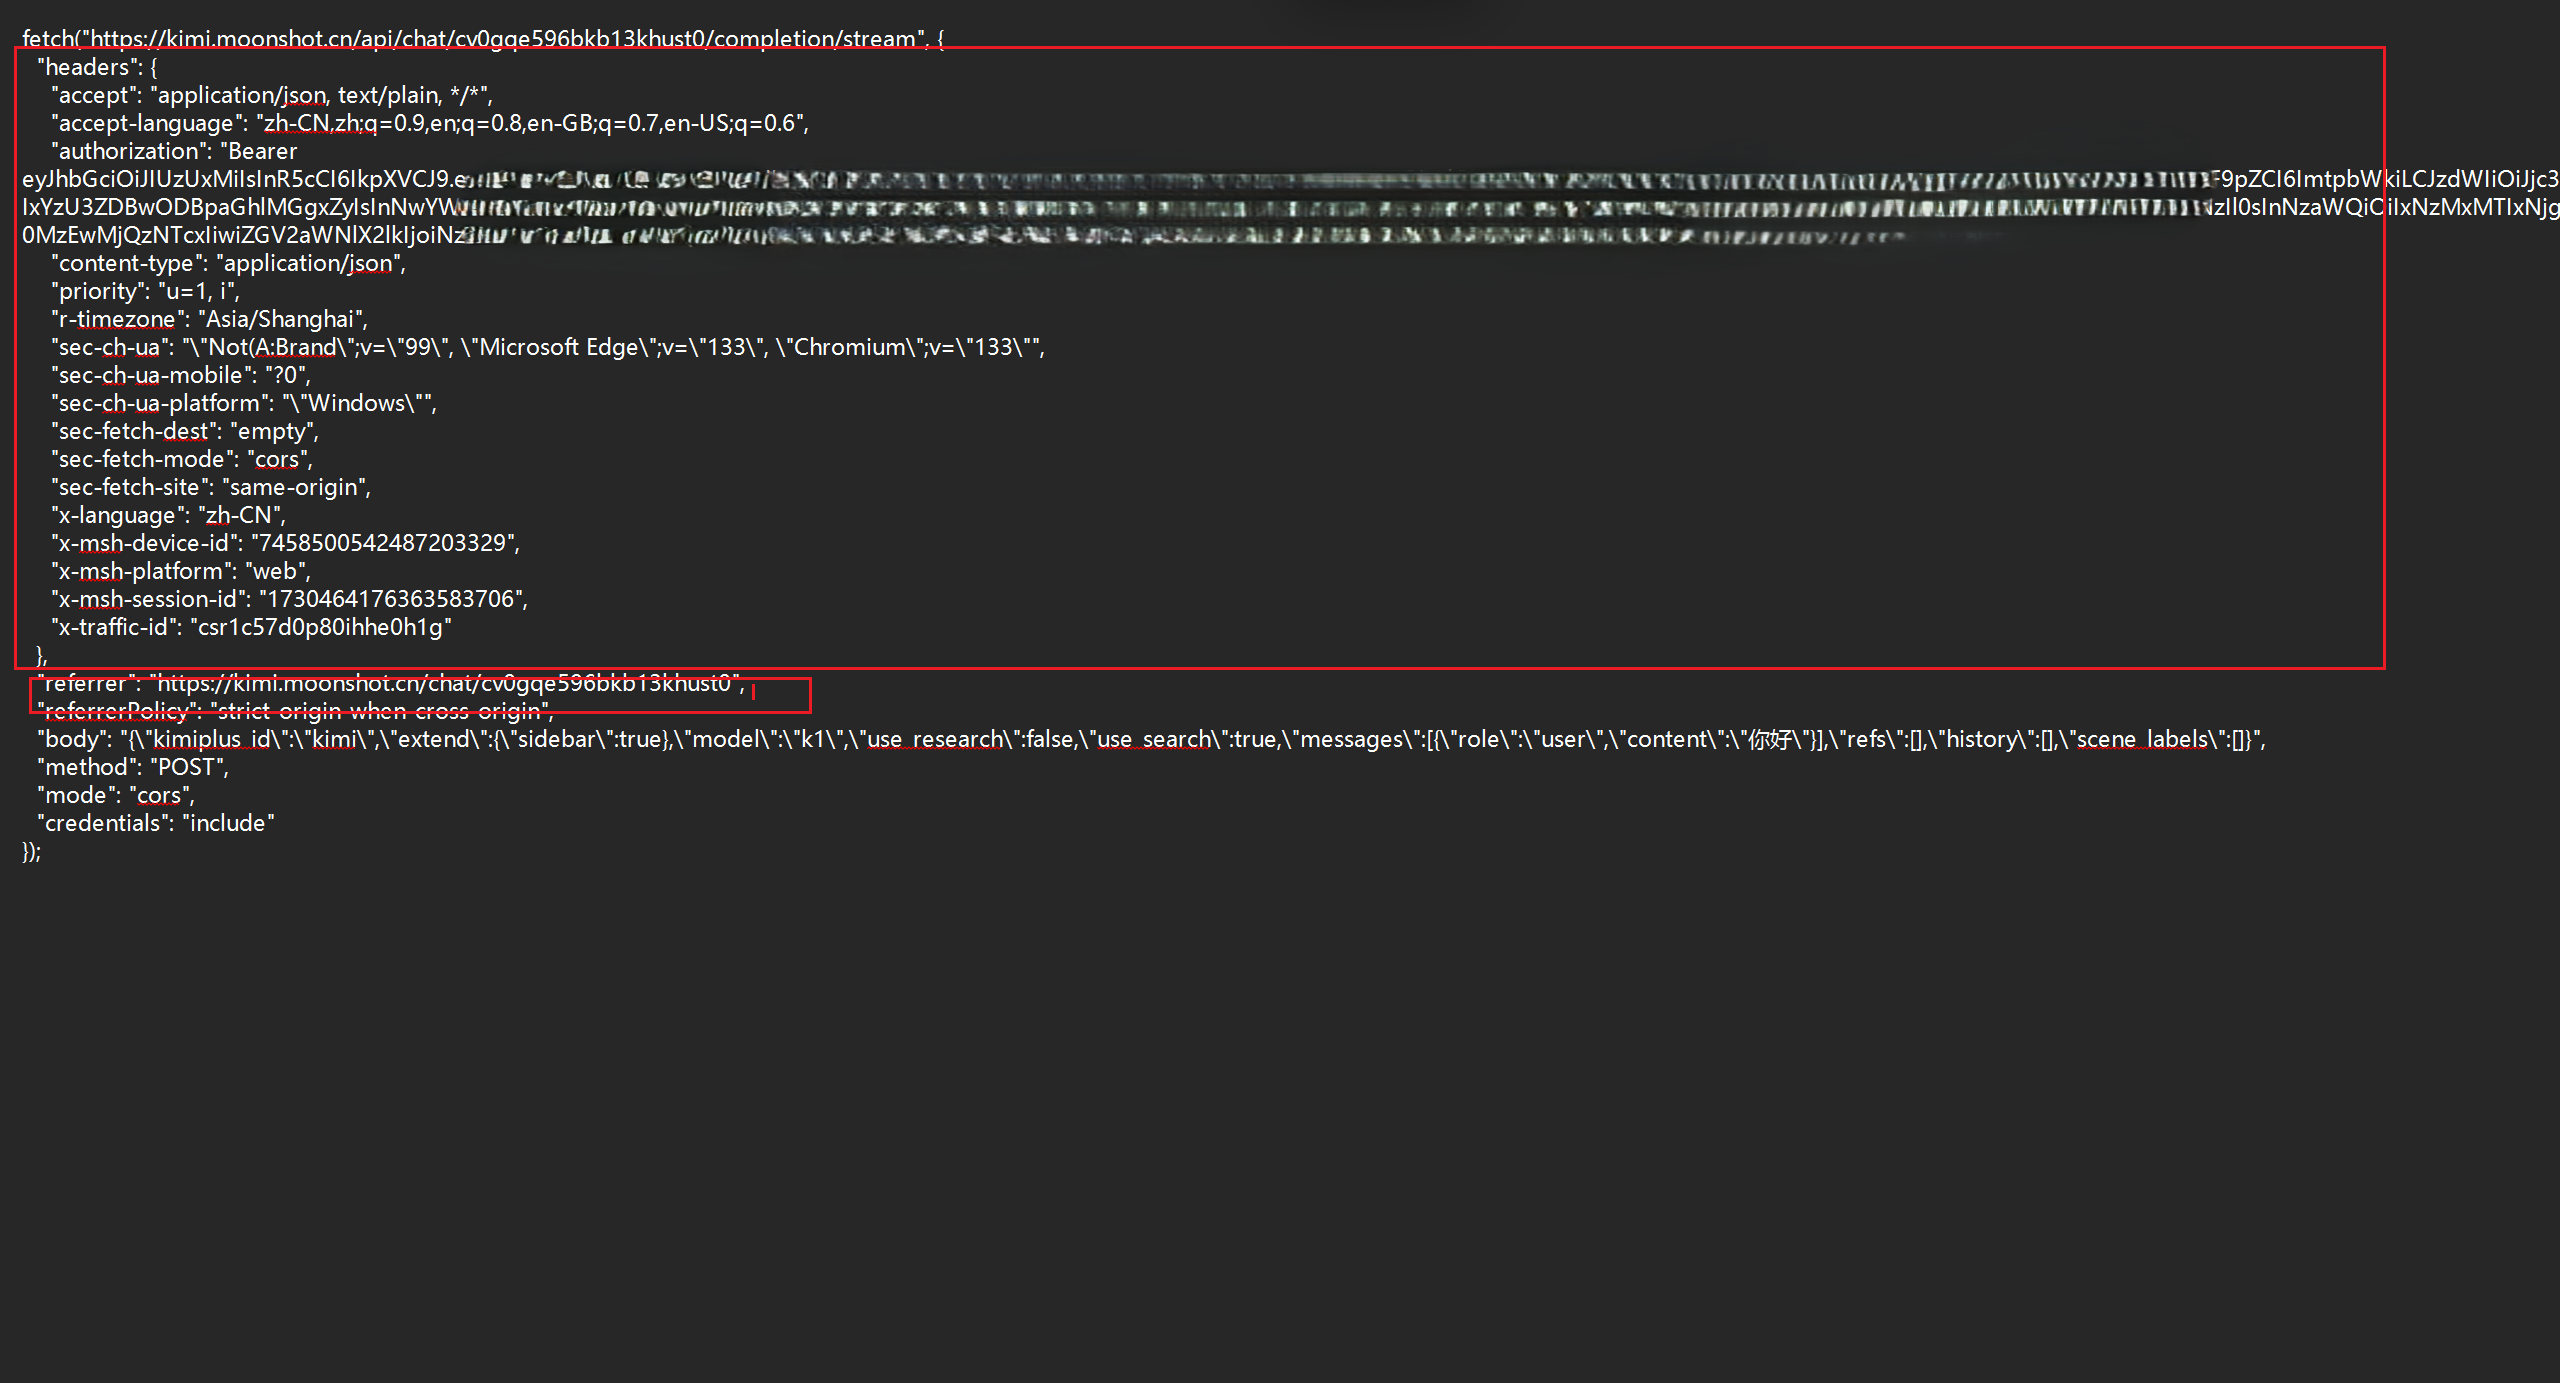
- 现在我们先把发送请求的请求头写好。先打开原来我们临时保存的
fetch请求的代码,找到headers和referer,如图:
- 拼接响应体:
 1
 2
 3
 4
 5
 6
 7
 8
 9
10
11
12
13
14
15
|
            final String url = "https://kimi.moonshot.cn/api/chat/cv031bl96bkb13hgn0p0/completion/stream";
            final String json = "{"
                    + "\"kimiplus_id\": \"kimi\","
                    + "\"extend\": {\"sidebar\": true},"
                    + "\"model\": \"k1\","
                    + "\"use_research\": false,"
                    + "\"use_search\": true,"
                    + "\"messages\": [{\"role\": \"user\", \"content\": \" "+requestContent+"\"}],"
                    + "\"refs\": [],"
                    + "\"history\": [],"
                    + "\"scene_labels\": []"
                    + "}";

            RequestBody body = RequestBody.create(
                    MediaType.parse("application/json"), json);
|
- 根据临时保存的
fetch请求的代码的headers和referer,我们可以写出请求头的代码,如下:
 1
 2
 3
 4
 5
 6
 7
 8
 9
10
11
12
13
14
15
16
17
18
19
20
21
22
23
|
 Request request = new Request.Builder()
                   .url(url)
                   .addHeader("accept", "application/json, text/plain, */*")
                   .addHeader("accept-language", "zh-CN,zh;q=0.9,en;q=0.8,en-GB;q=0.7,en-US;q=0.6")
                   .addHeader("authorization", "Bearer eyJhbGciOiJIUzUxMiIsInR5cCI6IkpXVCJ9.eyJpc3MiOiJ1c2VyLWNlbnRlciIsImV4cCxxxxxxxxxxxxxxxxxxxxxxxxxxxxxxxxxxxxW5fYWNjZXNzIl0sInNzaWQiOiIxNzMxMTIxNjg0MzEwMjQzNTcxIiwiZGV2aWNlX2lkIjoiNzQ1ODUwMDU0MjQ4NzIwMzMyOSJ9.if8b0gLsEWREisI6B8Bo-bHfbgYnUt5Rn_PZodayPXMoUUXq2V9rOMlhhoPHXYGnxbYKxOKHiv1VyzOrp1kB6w")
                   //这里的authorization内容在请求头的authorization字段中,这里我用xxxx代替
                   .addHeader("content-type", "application/json")
                   .addHeader("origin", "https://kimi.moonshot.cn")
                   .addHeader("referer", "https://kimi.moonshot.cn/chat/cv031bl96bkb13hgn0p0")
                   .addHeader("sec-ch-ua", "\"Not(A:Brand)\";v=\"99\", \"Microsoft Edge\";v=\"133\", \"Chromium\";v=\"133\"")
                   .addHeader("sec-ch-ua-mobile", "?0")
                   .addHeader("sec-ch-ua-platform", "\"Windows\"")
                   .addHeader("sec-fetch-dest", "empty")
                   .addHeader("sec-fetch-mode", "cors")
                   .addHeader("sec-fetch-site", "same-origin")
                   .addHeader("user-agent", "Mozilla/5.0 (Windows NT 10.0; Win64; x64) AppleWebKit/537.36 (KHTML, like Gecko) Chrome/133.0.0.0 Safari/537.36 Edg/133.0.0.0")
                   .addHeader("x-language", "zh-CN")
                   .addHeader("x-msh-device-id", "7458500542487203329")
                   .addHeader("x-msh-platform", "web")
                   .addHeader("x-msh-session-id", "1730464176363583706")
                   .addHeader("x-traffic-id", "csr1c57d0p80ihhe0h1g")
                   .post(body)
                   .build();
|
3.1.3 发送请求
1
2
3
4
5
6
7
|
        try(Response response = client.newCall(request).execute()){
           if (!response.isSuccessful()) {
                    throw new IOException("Unexpected code " + response);
            }

            //接下来我们要对返回的数据进行处理
        }
|
3.1.4 处理返回的数据大致思路
使用这个 API 发送请求之后,得到的响应体是“流式”的,而并非一次性返回所有数据。我们可以在浏览器开发者工具里面观察:
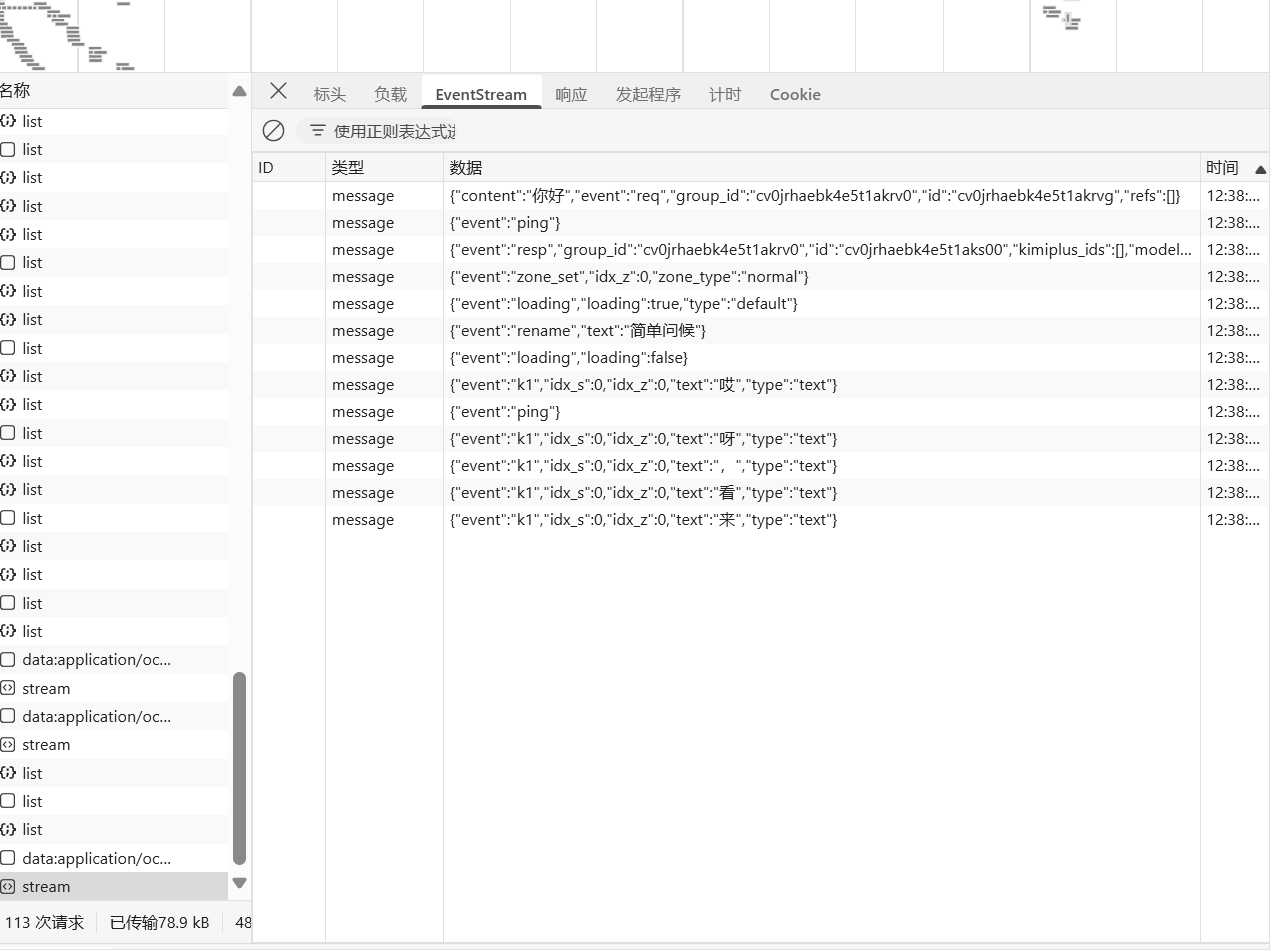 其实,这个叫做“EventStream”。
Event Stream 技术是一种允许服务器向客户端推送实时数据的技术。与传统的客户端定期轮询服务器以获取数据的方式不同,Event Stream 技术允许服务器在有新数据可用时立即向客户端推送数据。这种技术通常基于 HTTP/2 协议,通过持久连接实现数据的实时推送。
我们现在要做的就是在后端接收这个“EventStream”,然后再推送给前端。这个技术在 SpringBoot 中有一个很好的实现,叫做SseEmitter。
我们现在接着要做的是处理 Kimi 后端返回的EventStream流:在 OKHttp 发送请求之后,我们获取响应体流,然后解析每一行数据,通过回调函数返回给前端。
3.1.5 创建回调Callback接口
在util包下新建一个文件Callback.java,定义Callback接口:
1
2
3
4
5
6
7
|
package cn.programcx.springbootinit.utils;

public interface Callback {
    void onMessage(String message); //处理返回的数据
    void onCompleted(); //处理完成
    void onError(Exception e);  //处理异常
}
|
3.1.6 处理返回的数据
先将 Callback 接口引入到KimiService类中,然后在chat方法中处理返回的数据:
 1
 2
 3
 4
 5
 6
 7
 8
 9
10
11
12
13
14
15
16
17
18
19
20
21
22
23
24
25
26
27
28
29
30
31
32
33
34
35
36
37
|
 // 发起请求并处理响应
            try (Response response = client.newCall(request).execute()) {
                if (!response.isSuccessful()) {
                    throw new IOException("Unexpected code " + response);
                }

                // 获取响应体流
                BufferedSource source = response.body().source();

                // 读取响应流并处理
                while (true) {
                    String line = source.readUtf8Line();
                    if (line != null && !line.trim().isEmpty()) {
                        // 这里可以根据需要解析流数据
                        if (line.startsWith("data:")) {
                            String data = line.substring(5).trim();

                            JSONObject jsonObject = JSONObject.parseObject(data);   //将返回的数据转换为json对象

                            //处理返回的数据
                            if(jsonObject.getString("event").equals("k1")||jsonObject.getString("event").equals("cmpl")){   //判断是否是对话内容
                                String content = jsonObject.getString("text");
                                if (content != null) {
                                    callback.onMessage(content);
                                    System.out.print(content);
                                }
                            }else if (jsonObject.getString("event").equals("all_done")) {   //判断是否对话结束
                                callback.onCompleted();
                                return CompletableFuture.completedFuture(null);
                            }
                        }
                    }
                }
            }catch (Exception e){
                callback.onError(e);
                return CompletableFuture.completedFuture(null);
            }
|
3.2 使用SseEmitter推送数据
在controller包下创建一个KimiController类,创建一个kimi方法,以下是KimiController类的代码大致框架:
 1
 2
 3
 4
 5
 6
 7
 8
 9
10
11
12
13
14
15
16
17
18
19
20
21
22
23
24
25
26
27
28
|
package cn.programcx.springbootinit.controller;

import cn.programcx.springbootinit.services.KimiService;
import cn.programcx.springbootinit.utils.Callback;
import org.springframework.beans.factory.annotation.Autowired;
import org.springframework.stereotype.Controller;
import org.springframework.web.bind.annotation.PostMapping;
import org.springframework.web.bind.annotation.RequestMapping;
import org.springframework.web.bind.annotation.ResponseBody;
import org.springframework.web.servlet.mvc.method.annotation.SseEmitter;

import java.io.IOException;

@Controller
@RequestMapping("chat")
public class ChatController {
    @Autowired
    private KimiService kimiService;

    @PostMapping("/kimi")
    @ResponseBody
    private SseEmitter kimi(String message) throws IOException {
        SseEmitter sseEmitter = new SseEmitter();
        //此处调用KimiService的chat方法,并处理回调函数,将数据通过sseEmitter推流的方式(也就是上文的EventSteam)推送给前端
        return sseEmitter;
    }

}
|
3.2.1 处理回调函数
SseEmitter 使用方法
接下来讲解一下SseEmitter的使用方法。SseEmitter是 SpringBoot 提供的一个用于推送数据的类,它可以将数据推送给前端,实现实时更新
我们需要用到SseEmitter类的SseEmitter(Long timeout)、send(Object object)、completeWithError(Throwable)方法。可以通过查询官方文档了解更多关于SseEmitter的使用方法。
SseEmitter(Long timeout)
创建具有自定义超时值的 SseEmitter。
- 参数:
timeout - 超时值(以毫秒为单位)。
send(Object object)
发送格式为单个 SSE “data” 行的对象。
- 参数:
object - 要发送的对象。可以是任何对象,但它将被转换为字符串。
SseEmitter(Long timeout)
创建具有自定义超时值的 SseEmitter。
- 参数:
timeout - 超时值(以毫秒为单位)。
completeWithError(Throwable ex)
使用给定的异常完成此 SseEmitter。
处理回调函数
在KimiController类中,我们需要处理回调函数,将数据通过SseEmitter推送给前端。我们可以在KimiController类中创建一个Callback接口的实现类,然后在KimiService类中调用这个实现类的方法,将数据推送给前端。
 1
 2
 3
 4
 5
 6
 7
 8
 9
10
11
12
13
14
15
16
17
18
19
20
21
22
23
24
25
26
27
|
    @PostMapping("/kimi")
    @ResponseBody
    private SseEmitter kimi(String message) throws IOException {
        System.out.println(message);
        SseEmitter sseEmitter = new SseEmitter(0L); //取消超时时间,防止中断传输
        kimiService.chat(message, new Callback() {
            @Override
            public void onMessage(String message) {
                try {
                    sseEmitter.send(message); //推送数据
                } catch (IOException e) {
                    e.printStackTrace();
                }
            }

            @Override
            public void onCompleted() {
                sseEmitter.complete();
            }

            @Override
            public void onError(Exception e) {
                sseEmitter.completeWithError(e);
            }
        });
        return sseEmitter;
    }
|
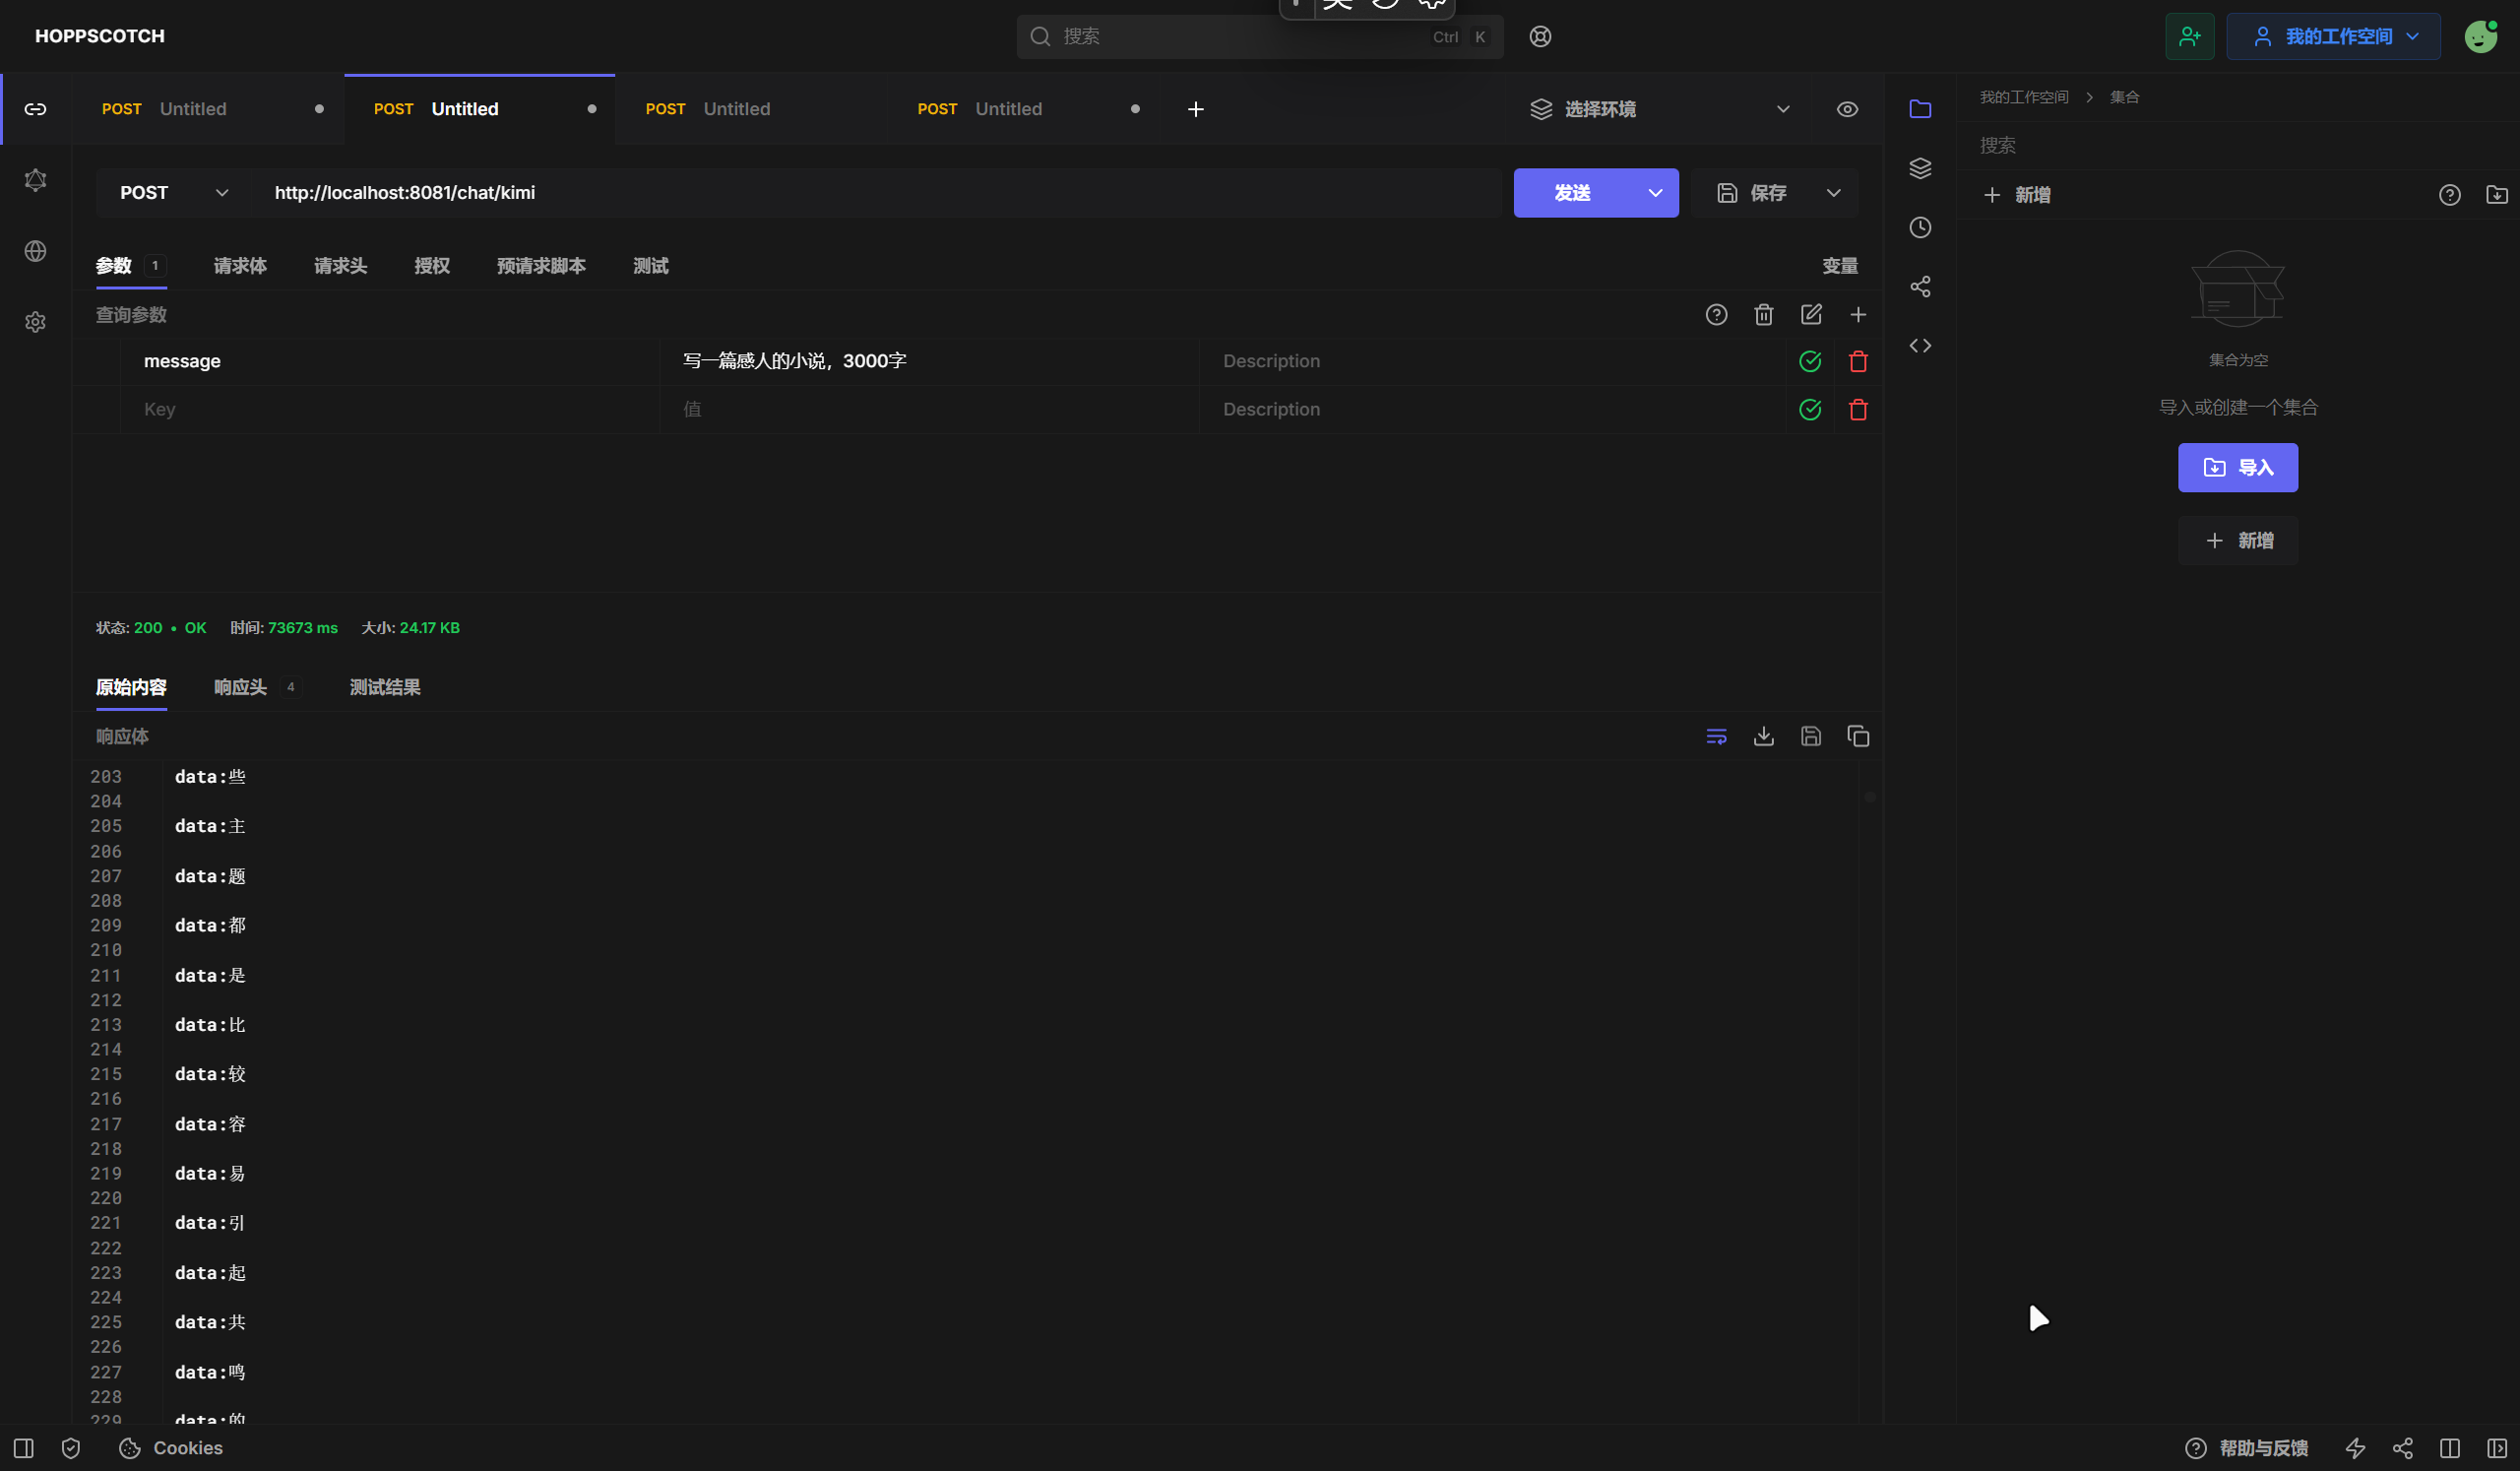
3.3 测试
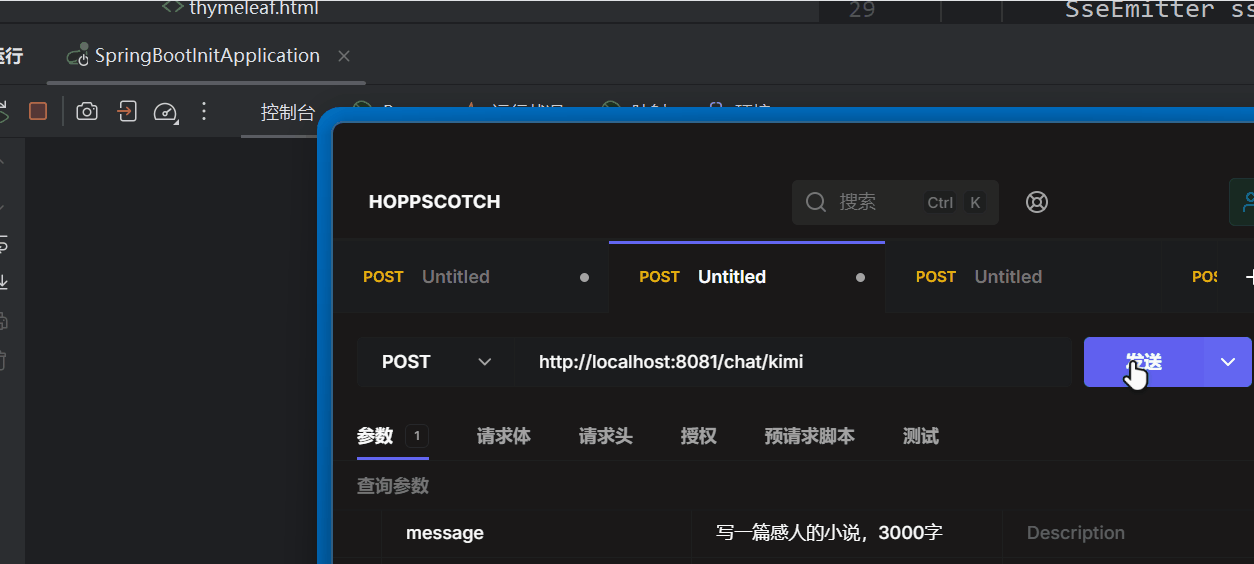
现在我们可以测试一下我们的代码是否能够正常运行。我们可以使用 Hoppscotch 或者 curl 来测试我们的代码。
运行Gif:
Hoppscotch 截图:
4. 完整代码
cn.programcx.springbootinit.controller.ChatController.java
 1
 2
 3
 4
 5
 6
 7
 8
 9
10
11
12
13
14
15
16
17
18
19
20
21
22
23
24
25
26
27
28
29
30
31
32
33
34
35
36
37
38
39
40
41
42
43
44
45
46
47
48
|
package cn.programcx.springbootinit.controller;

import cn.programcx.springbootinit.services.KimiService;
import cn.programcx.springbootinit.utils.Callback;
import org.springframework.beans.factory.annotation.Autowired;
import org.springframework.stereotype.Controller;
import org.springframework.web.bind.annotation.PostMapping;
import org.springframework.web.bind.annotation.RequestMapping;
import org.springframework.web.bind.annotation.ResponseBody;
import org.springframework.web.servlet.mvc.method.annotation.SseEmitter;

import java.io.IOException;

@Controller
@RequestMapping("chat")
public class ChatController {
    @Autowired
    private KimiService kimiService;

    @PostMapping("/kimi")
    @ResponseBody
    private SseEmitter kimi(String message) throws IOException {
        System.out.println(message);
        SseEmitter sseEmitter = new SseEmitter(0L);
        kimiService.chat(message, new Callback() {
            @Override
            public void onMessage(String message) {
                try {
                    sseEmitter.send(message);
                } catch (IOException e) {
                    e.printStackTrace();
                }
            }

            @Override
            public void onCompleted() {
                sseEmitter.complete();
            }

            @Override
            public void onError(Exception e) {
                sseEmitter.completeWithError(e);
            }
        });
        return sseEmitter;
    }

}
|
cn.programcx.springbootinit.services.KimiService.java
 1
 2
 3
 4
 5
 6
 7
 8
 9
10
11
12
13
14
15
16
17
18
19
20
21
22
23
24
25
26
27
28
29
30
31
32
33
34
35
36
37
38
39
40
41
42
43
44
45
46
47
48
49
50
51
52
53
54
55
56
57
58
59
60
61
62
63
64
65
66
67
68
69
70
71
72
73
74
75
76
77
78
79
80
81
82
83
84
85
86
87
88
89
90
91
92
93
94
95
96
97
98
99
|
package cn.programcx.springbootinit.services;

import com.alibaba.fastjson2.JSONObject;
import okhttp3.*;
import okio.BufferedSource;
import org.springframework.beans.factory.annotation.Autowired;
import org.springframework.scheduling.annotation.Async;
import org.springframework.stereotype.Service;

import java.io.IOException;
import java.util.concurrent.CompletableFuture;
import cn.programcx.springbootinit.utils.Callback;

@Service
public class KimiService {

    private static final OkHttpClient client = new OkHttpClient();

    @Async
    public CompletableFuture<String> chat(String requestContent,Callback callback) throws IOException {
        {

            final String url = "https://kimi.moonshot.cn/api/chat/cv031bl96bkb13hgn0p0/completion/stream";
            final String json = "{"
                    + "\"kimiplus_id\": \"kimi\","
                    + "\"extend\": {\"sidebar\": true},"
                    + "\"model\": \"k1\","
                    + "\"use_research\": false,"
                    + "\"use_search\": true,"
                    + "\"messages\": [{\"role\": \"user\", \"content\": \" "+requestContent+"\"}],"
                    + "\"refs\": [],"
                    + "\"history\": [],"
                    + "\"scene_labels\": []"
                    + "}";

            RequestBody body = RequestBody.create(
                    MediaType.parse("application/json"), json);

            Request request = new Request.Builder()
                    .url(url)
                    .addHeader("accept", "application/json, text/plain, */*")
                    .addHeader("accept-language", "zh-CN,zh;q=0.9,en;q=0.8,en-GB;q=0.7,en-US;q=0.6")
                    .addHeader("authorization", "Bearer eyJhbGciOiJIUzUxMiIsInR5cCI6IkpXVCJ9.eyJpc3MiOiJ1c2VyLWNlbnRlciIsImV4cCxxxxxxxxxxxxxxxxxxxxxxxxxxxxxxxxxxxxW5fYWNjZXNzIl0sInNzaWQiOiIxNzMxMTIxNjg0MzEwMjQzNTcxIiwiZGV2aWNlX2lkIjoiNzQ1ODUwMDU0MjQ4NzIwMzMyOSJ9.if8b0gLsEWREisI6B8Bo-bHfbgYnUt5Rn_PZodayPXMoUUXq2V9rOMlhhoPHXYGnxbYKxOKHiv1VyzOrp1kB6w") //这里是你的token,保密起见,这里部分字符串用x代替
                    .addHeader("content-type", "application/json")
                    .addHeader("origin", "https://kimi.moonshot.cn")
                    .addHeader("referer", "https://kimi.moonshot.cn/chat/cv031bl96bkb13hgn0p0")
                    .addHeader("sec-ch-ua", "\"Not(A:Brand)\";v=\"99\", \"Microsoft Edge\";v=\"133\", \"Chromium\";v=\"133\"")
                    .addHeader("sec-ch-ua-mobile", "?0")
                    .addHeader("sec-ch-ua-platform", "\"Windows\"")
                    .addHeader("sec-fetch-dest", "empty")
                    .addHeader("sec-fetch-mode", "cors")
                    .addHeader("sec-fetch-site", "same-origin")
                    .addHeader("user-agent", "Mozilla/5.0 (Windows NT 10.0; Win64; x64) AppleWebKit/537.36 (KHTML, like Gecko) Chrome/133.0.0.0 Safari/537.36 Edg/133.0.0.0")
                    .addHeader("x-language", "zh-CN")
                    .addHeader("x-msh-device-id", "7458500542487203329")
                    .addHeader("x-msh-platform", "web")
                    .addHeader("x-msh-session-id", "1730464176363583706")
                    .addHeader("x-traffic-id", "csr1c57d0p80ihhe0h1g")
                    .post(body)
                    .build();

            // 发起请求并处理响应
            try (Response response = client.newCall(request).execute()) {
                if (!response.isSuccessful()) {
                    throw new IOException("Unexpected code " + response);
                }

                // 获取响应体流
                BufferedSource source = response.body().source();

                // 读取响应流并处理
                while (true) {
                    String line = source.readUtf8Line();
                    if (line != null && !line.trim().isEmpty()) {
                        // 这里可以根据需要解析流数据
                        if (line.startsWith("data:")) {
                            String data = line.substring(5).trim();

                            JSONObject jsonObject = JSONObject.parseObject(data);
                            if(jsonObject.getString("event").equals("k1")||jsonObject.getString("event").equals("cmpl")){
                                String content = jsonObject.getString("text");
                                if (content != null) {
                                    callback.onMessage(content);
                                    System.out.print(content);
                                }
                            }else if (jsonObject.getString("event").equals("all_done")) {
                                callback.onCompleted();
                                return CompletableFuture.completedFuture(null);
                            }
                        }
                    }
                }
            }catch (Exception e){
                callback.onError(e);
                return CompletableFuture.completedFuture(null);
            }
        }
    }
}
|
cn.programcx.springbootinit.utils.Callback.java
1
2
3
4
5
6
7
|
package cn.programcx.springbootinit.utils;

public interface Callback {
    void onMessage(String message);
    void onCompleted();
    void onError(Exception e);
}
|
5. 总结
本文主要介绍了如何获取 Kimi 网页端对话 api,并实现后端推流。在实现后端推流的过程中,我们使用了CompletableFuture异步编程、SseEmitter后端推流、实现回调等技术。希望本文对你有所帮助。
