JPA 在Spring Boot中的基本使用
1. 添加依赖
1
2
3
4
|
<dependency>
    <groupId>org.springframework.boot</groupId>
    <artifactId>spring-boot-starter-data-jpa</artifactId>
</dependency>
|
2. 配置数据源
1
2
3
4
5
|
spring:
  datasource:
    url: jdbc:mysql://localhost:3306/init?useUnicode=true&characterEncoding=utf-8&useSSL=false&serverTimezone=GMT%2B8
    username: root
    password: mysql
|
3.常用注解
@Entity:声明一个实体类@Table:指定实体类对应的表
name:指定表名catalog:指定数据库名schema:指定数据库模式uniqueConstraints:指定表的唯一约束indexes:指定表的索引
@Id:声明一个实体类的主键,一个实体只能有一个属性被映射为主键@GeneratedValue:指定主键的生成策略
AUTO:自动选择合适的策略, 默认值IDENTITY:数据库自增SEQUENCE:数据库序列TABLE:数据库表
默认为AUTO
@Column:指定实体类属性与数据库表字段的映射关系
name:指定字段名nullable:是否允许为空unique:是否唯一length:字段长度precision:精度scale:小数位数insertable:是否插入updatable:是否更新columnDefinition:字段定义
@Transient:声明一个实体类属性不与数据库表字段映射@OneToMany:一对多关联
targetEntity:目标实体类mappedBy:指定关联的属性cascade:级联操作fetch:加载策略
@ManyToOne:多对一关联
targetEntity:目标实体类cascade:级联操作fetch:加载策略
@ManyToMany:多对多关联
targetEntity:目标实体类mappedBy:指定关联的属性cascade:级联操作fetch:加载策略
@OneToOne:一对一关联
targetEntity:目标实体类mappedBy:指定关联的属性cascade:级联操作fetch:加载策略optional:是否可选
@JoinColumns:指定多个外键列
@JoinColumn:指定外键列name:指定外键列名referencedColumnName:指定参考列名nullable:是否允许为空unique:是否唯一insertable:是否插入updatable:是否更新
@JoinColumn:指定外键列
name:指定外键列名referencedColumnName:指定参考列名nullable:是否允许为空unique:是否唯一insertable:是否插入updatable:是否更新
@JoinTable:指定中间表
name:指定中间表名joinColumns:指定当前表的外键列inverseJoinColumns:指定目标表的外键列
@OrderBy:指定排序
value:排序字段asc:是否升序
@Query:自定义查询
value:查询语句nativeQuery:是否使用原生SQLcountQuery:查询总数name:查询名称hints:查询提示
@PrePersist:保存前执行
解释:
多对一查询(@ManyToOne)
在多对一查询中,我们一般使用 @ManyToOne 注解,让“多”的一方存储外键,指向“单个”的一方。比如,消息表 (tb_messages) 里的 senderUserId 作为外键,指向用户表 (tb_users) 的 id。
@ManyToOne 注解中,我们可以:
一对多查询(@OneToMany)
在一对多查询中,我们一般使用 @OneToMany 注解,表示一个实体类可以对应多个子实体。**数据库不会创建外键列,而是通过 “多” 的一方的 @ManyToOne 维护关系。**例如:
1
2
|
@OneToMany(mappedBy = "user", cascade = CascadeType.ALL, fetch = FetchType.LAZY)
private List<Messages> messages;
|
上述代码写在要被映射到的POJO类中,表示这个类有一个 List 类型的 messages 属性,这个属性是一个一对多关系。
多对多查询(@ManyToMany)
在多对多查询中,我们一般使用 @ManyToMany 注解,表示两个实体类之间有多对多关系。**数据库会创建中间表,中间表存储两个实体类的主键。**例如:
1
2
3
|
@ManyToMany
@JoinTable(name = "tb_user_to_user", joinColumns = @JoinColumn(name = "userId_1"), inverseJoinColumns = @JoinColumn(name = "userId_2"))
private List<Users> users;
|
上述代码写在要被映射到的POJO类中,表示这个类有一个 List 类型的 users 属性,这个属性是一个多对多关系。
一对一查询(@OneToOne)
在一对一查询中,我们一般使用 @OneToOne 注解,表示两个实体类之间有一对一关系。**数据库会创建外键列,外键列存储两个实体类的主键。**例如:
1
2
3
4
|
@OneToOne
@JoinColumn(name = "userToUserId", nullable = false)
private UserToUser userToUser;
|
上述代码写在要被映射到的POJO类中,表示这个类有一个 UserToUser 类型的 userToUser 属性,这个属性是一个一对一关系。
-
@JoinColumn:指定外键列。
-
name:指定外键列名。
-
referencedColumnName:指定参考列名。
-
nullable:是否允许为空。
-
unique:是否唯一。
-
insertable:是否允许插入。此属性在我们不希望JPA操作这个字段时,可以设置为false。
-
updatable:是否允许更新。此属性在我们不希望JPA操作这个字段时,可以设置为false。
-
optional:是否可选。
4.简单增删改查
随便创建一个数据库,命名为init,创建一个表new,表结构如下:

4.1 创建实体类
 1
 2
 3
 4
 5
 6
 7
 8
 9
10
11
12
13
14
15
16
17
18
19
20
21
22
23
24
25
26
27
28
29
30
31
32
33
34
35
36
37
38
39
40
41
42
43
44
45
46
47
48
|
package cn.programcx.springbootinit.model;

import javax.persistence.*;

@Entity
@Table(name = "new")
public class Newer {
    @Id
    @Column(name = "id")
    @GeneratedValue(strategy = GenerationType.IDENTITY)
    private int id;

    @Column(name = "name")
    private String name;

    public Newer(int id, String name) {
        this.id = id;
        this.name = name;
    }

    public int getId() {
        return id;
    }

    public void setId(int id) {
        this.id = id;
    }

    public String getName() {
        return name;
    }

    public void setName(String name) {
        this.name = name;
    }

    public Newer() {

    }
    @Override
    public String toString() {
        return "Newers{" +
                "id=" + id +
                ", name='" + name + '\'' +
                '}';
    }

}
|
注解解释:
@Entity:声明一个实体类,比如Newer就是一个实体类@Table:指定实体类对应的表,比如Newer对应的表是new@Id:声明一个实体类的主键,一个实体只能有一个属性被映射为主键@GeneratedValue:指定主键的生成策略,这里使用IDENTITY,即数据库自增。我们用的是MySQL数据库,所以是IDENTITY,如果是Oracle数据库,就是SEQUENCE。@Column:指定实体类属性与数据库表字段的映射关系,比如id对应的字段是id,name对应的字段是name
4.2 创建Repository
我们需要使用一个类来操作数据库,这个类就是NewerDao,我们需要创建一个NewerDao接口,继承JpaRepository接口,JpaRepository接口有很多方法,比如save、delete、findAll等等,我们可以直接使用这些方法,也可以自定义方法。
1
2
3
4
5
6
7
8
|
package cn.programcx.springbootinit.dao;

import cn.programcx.springbootinit.model.Newer;

import org.springframework.data.jpa.repository.JpaRepository;

public interface NewerDao extends JpaRepository<Newer, Integer> {
}
|
4.3 增
我们在进行每一次操作之前,都需要先创建一个Newer对象,然后再进行操作。操作结束后,我们需要调用save方法,将对象保存到数据库中。
创建一个测试类,测试增加操作。
 1
 2
 3
 4
 5
 6
 7
 8
 9
10
11
12
13
14
15
16
17
18
19
20
21
22
23
24
25
26
|
package cn.programcx.springbootinit;

import cn.programcx.springbootinit.dao.NewerDao;
import cn.programcx.springbootinit.model.Newer;
import org.junit.jupiter.api.Test;
import org.springframework.beans.factory.annotation.Autowired;
import org.springframework.boot.test.context.SpringBootTest;

import org.springframework.jdbc.core.JdbcTemplate;

@SpringBootTest(webEnvironment = SpringBootTest.WebEnvironment.RANDOM_PORT)
class SpringBootInitApplicationTests {
    @Autowired
    JdbcTemplate jdbcTemplate;

    @Autowired
    NewerDao newerDao;

    @Test
    void test() {
        Newer newer = new Newer();
        newer.setName("Program");
        newerDao.save(newer);   //保存到数据库
    }

}
|
4.4 删
删除操作和增加操作类似,我们需要先创建一个Newer对象,然后再进行操作。操作结束后,我们需要调用delete方法,将对象从数据库中删除。
1
2
3
4
5
|
void test() {
    Newer newer = new Newer();
    newer.setId(1);
    newerDao.delete(newer);   //删除
}
|
4.5 改
修改操作和增加操作类似,我们需要先创建一个Newer对象,然后再进行操作。操作结束后,我们需要调用save方法,将对象保存到数据库中。
1
2
3
4
5
6
7
|
void test() {
    Newer newer = new Newer();
    newer.setId(1);
    newer.setName("ProgramCX");
    newerDao.save(newer);   //修改
}
|
4.6 查
查询操作和增加操作类似,我们需要先创建一个Newer对象,然后再进行操作。操作结束后,我们需要调用findAll方法,将对象保存到数据库中。
1
2
3
4
5
6
7
|
void test() {
    List<Newer> list = newerDao.findAll();   //查询
    for (Newer newer : list) {
        System.out.println(newer);
    }
}
|
5. 复杂增删改查
5.1 多表
有点难度哈,让我尝试尝试😭
本例中,我们设计一个简单的即时通信软件的数据库。即时通信软件的数据库设计是一个比较复杂的问题,我们只设计一个简单的数据库,只包含用户表、消息表和用户关系表。用于学习JPA的多对多和多对一关联。
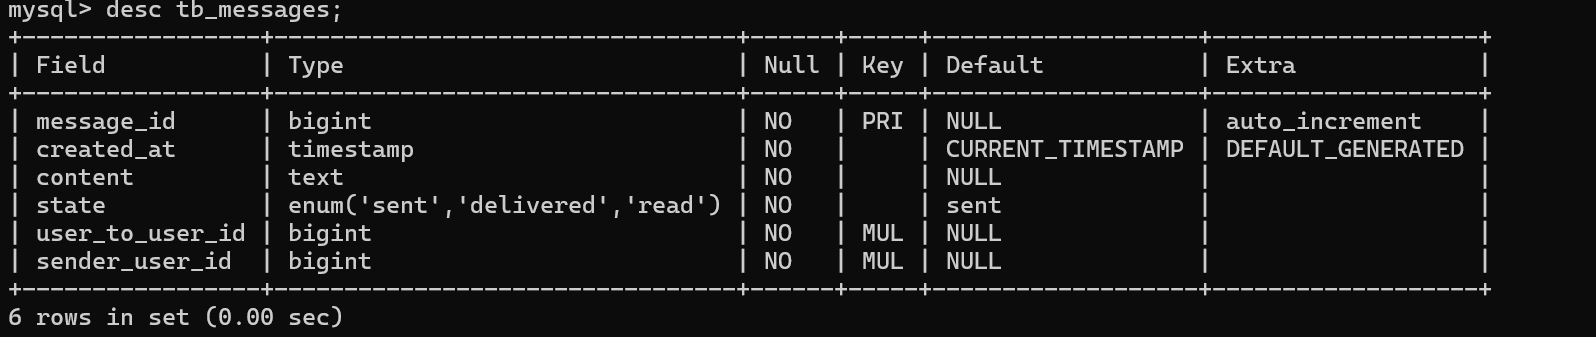
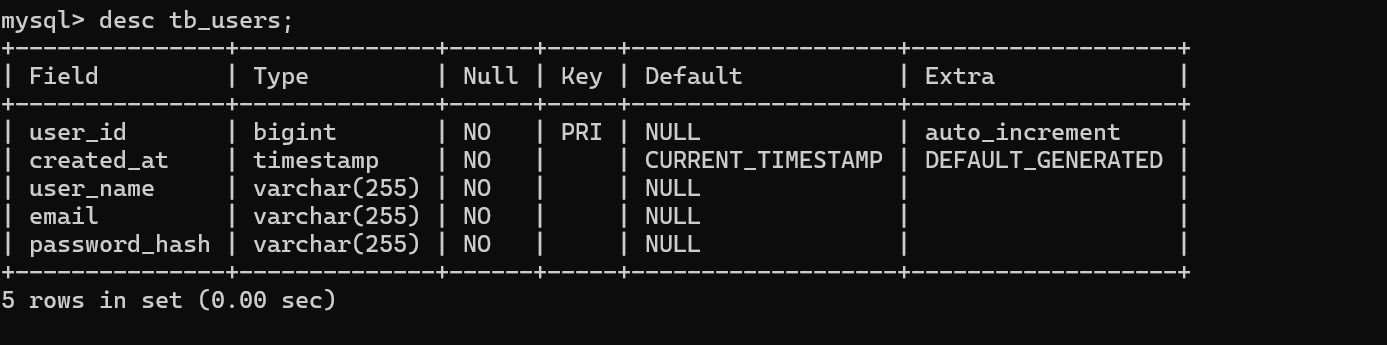
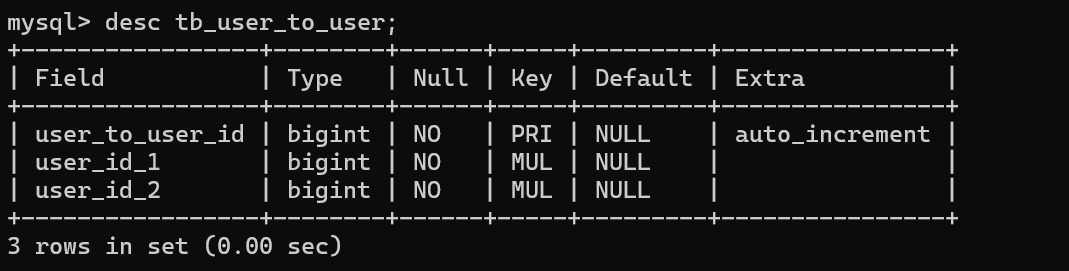
设计三个表: tb_messages,tb_user_to_user,tb_users。tb_messages表存储消息,tb_user_to_user表存储用户之间的消息关系(中间表),tb_users表存储用户信息。
创建表的代码…不提供了,我懒,qwq。就展示一下表结构吧。
简述一下表结构:
- tb_messages表:消息表,存储消息。其中,userToUserId是外键,指向tb_user_to_user表的user_to_user_id。
- tb_user_to_user表:用户关系表,存储用户与用户之间的关系。其中,userId_1和userId_2是外键,指向tb_users表的user_id。两者顺序可以是随机的。因为在及时通信软件中,发消息的人和收消息的人是没有先后顺序的。
- tb_users表:用户表,存储用户信息。其中,createdAt是用户创建时间戳。
注意:所有表的外键属性都要设置为CASCADE!!!不然进行修改会造成外键冲突!!!
5.1.1 创建实体类
创建三个实体类:Messages、UserToUser、Users。放在model包下。
Messages实体类
 1
 2
 3
 4
 5
 6
 7
 8
 9
10
11
12
13
14
15
16
17
18
19
20
21
22
23
24
25
26
27
28
29
30
31
32
33
34
35
36
37
38
39
40
41
42
43
44
45
46
47
48
49
50
51
52
53
54
55
56
57
58
59
|
package cn.programcx.springbootinit.model;

import lombok.AllArgsConstructor;
import lombok.Getter;
import lombok.NoArgsConstructor;
import lombok.Setter;

import javax.persistence.*;
import java.sql.Timestamp;

@Entity
@Table(name = "tb_messages")
@Getter
@Setter
@NoArgsConstructor
@AllArgsConstructor
public class Messages {

    @Id
    @Column(name = "message_id")
    @GeneratedValue(strategy = GenerationType.IDENTITY) //自增
    private Long id;

    @Column(name = "created_at",nullable = false,updatable = false)
    private Timestamp time;

    @Column(name = "content",columnDefinition = "TEXT",nullable = false) //声明为TEXT类型
    private String content;

    @Enumerated(EnumType.STRING) //声明为枚举类型
    @Column(name = "state",nullable = false)
    private State state = State.sent;

    @ManyToOne
    @JoinColumn(name = "user_to_user_id", nullable = false)
    private UserToUser userToUser;


    @PrePersist //保存前执行
    protected void onCreate() {
        time = new Timestamp(System.currentTimeMillis()); //设置时间戳
    }

    public enum State {
        sent,delivered,read
    }

    @Override
    public String toString() {
        return "Messages{" +
                "id=" + id +
                ", time=" + time +
                ", content='" + content + '\'' +
                ", state=" + state +
                ", sender=" + sender +
                ", userToUser=" + userToUser +
                '}';
    }
}
|
UserToUser实体类
 1
 2
 3
 4
 5
 6
 7
 8
 9
10
11
12
13
14
15
16
17
18
19
20
21
22
23
24
25
26
27
28
29
30
|
package cn.programcx.springbootinit.model;

import lombok.AllArgsConstructor;
import lombok.Getter;
import lombok.NoArgsConstructor;
import lombok.Setter;

import javax.persistence.*;

@Entity
@Getter
@Setter
@NoArgsConstructor
@AllArgsConstructor
@Table(name = "tb_user_to_user")
public class UserToUser {

    @Id
    @Column(name = "user_to_user_id")
    @GeneratedValue(strategy = GenerationType.IDENTITY)
    private Long id;

    @ManyToOne
    @JoinColumn(name = "user_id_1", nullable = false)
    private Users user1;

    @ManyToOne
    @JoinColumn(name = "user_id_2", nullable = false)
    private Users user2;
}
|
Users实体类
 1
 2
 3
 4
 5
 6
 7
 8
 9
10
11
12
13
14
15
16
17
18
19
20
21
22
23
24
25
26
27
28
29
30
31
32
33
34
35
36
37
38
39
40
41
42
43
44
45
46
47
48
49
50
51
52
|
package cn.programcx.springbootinit.model;

import lombok.AllArgsConstructor;
import lombok.Getter;
import lombok.NoArgsConstructor;
import lombok.Setter;

import javax.persistence.*;
import java.sql.Timestamp;
import java.util.Set;

@Entity
@Getter
@Setter
@NoArgsConstructor
@AllArgsConstructor
@Table(name = "tb_users")
public class Users {

    @Id
    @Column(name = "user_id",nullable = false)
    @GeneratedValue(strategy = GenerationType.IDENTITY)
    private Long id;

    @Column(name = "created_at",updatable = false,nullable = false)
    private Timestamp time;

    @Column(name = "user_name",nullable = false)
    private String userName;

    @Column(name = "email",nullable = false)
    private String email;

    @Column(name = "password_hash",nullable = false)
    private String passwordHash;

    @PrePersist
    void setTime(){
        this.time = new Timestamp(System.currentTimeMillis());
    }

    @Override
    public String toString() {
        return "Users{" +
                "id=" + id +
                ", time=" + time +
                ", userName='" + userName + '\'' +
                ", email='" + email + '\'' +
                ", passwordHash='" + passwordHash + '\'' +
                '}';
    }
}
|
5.1.2 创建Repository
创建三个Repository接口:MessagesDao、UserToUserDao、UsersDao。放在dao包下。
MessagesDao接口
1
2
3
4
5
6
7
|
package cn.programcx.springbootinit.dao;

import cn.programcx.springbootinit.model.Messages;
import org.springframework.data.jpa.repository.JpaRepository;

public interface MessagesDao extends JpaRepository<Messages, Long> {
}
|
UserToUserDao接口
 1
 2
 3
 4
 5
 6
 7
 8
 9
10
11
12
13
14
15
|
package cn.programcx.springbootinit.dao;

import cn.programcx.springbootinit.model.UserToUser;
import org.springframework.data.jpa.repository.JpaRepository;
import org.springframework.data.jpa.repository.Modifying;
import org.springframework.data.jpa.repository.Query;
import org.springframework.transaction.annotation.Transactional;

public interface UserToUserDao extends JpaRepository<UserToUser, Long> {
    //自定义SQL语句,用于插入数据,如果已经存在则忽略
    @Modifying
    @Transactional
    @Query(value = "INSERT IGNORE INTO tb_user_to_user (user_id_1, user_id_2) VALUES (?1, ?2)", nativeQuery = true)
    void insertIgnore(Long userId1, Long userId2);
}
|
UsersDao接口
1
2
3
4
5
6
7
|
package cn.programcx.springbootinit.dao;

import cn.programcx.springbootinit.model.Users;
import org.springframework.data.jpa.repository.JpaRepository;

public interface UsersDao extends JpaRepository<Users, Long> {
}
|
5.1.3 测试
5.1.3.1 设置自增基数
执行以下SQL语句,设置自增基数。
1
2
3
|
ALTER TABLE tb_messages AUTO_INCREMENT = 1;
ALTER TABLE tb_user_to_user AUTO_INCREMENT = 1;
ALTER TABLE tb_users AUTO_INCREMENT = 1;
|
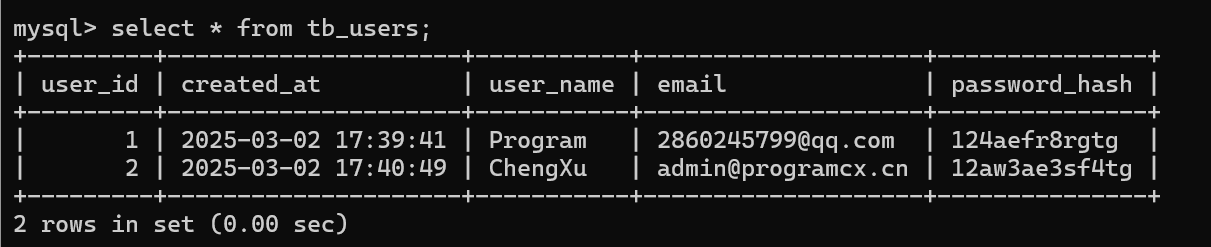
5.1.3.2 准备数据
在MySQL中执行以下SQL语句,准备数据。
1
2
|
INSERT INTO tb_users (user_id, user_name, email, password_hash) VALUES (1, 'ProgramCX', '2860245799@qq.com','dfa423sfasf342arf');
INSERT INTO tb_users (user_id, user_name, email, password_hash) VALUES (2, 'ChengXu', 'admin@programcx.cn','da3ssafq12323farf');
|
5.1.3.3 编写测试类
创建一个测试类
  1
  2
  3
  4
  5
  6
  7
  8
  9
 10
 11
 12
 13
 14
 15
 16
 17
 18
 19
 20
 21
 22
 23
 24
 25
 26
 27
 28
 29
 30
 31
 32
 33
 34
 35
 36
 37
 38
 39
 40
 41
 42
 43
 44
 45
 46
 47
 48
 49
 50
 51
 52
 53
 54
 55
 56
 57
 58
 59
 60
 61
 62
 63
 64
 65
 66
 67
 68
 69
 70
 71
 72
 73
 74
 75
 76
 77
 78
 79
 80
 81
 82
 83
 84
 85
 86
 87
 88
 89
 90
 91
 92
 93
 94
 95
 96
 97
 98
 99
100
101
102
103
104
105
106
107
108
109
110
111
112
113
114
115
116
117
118
119
120
121
122
123
124
125
126
127
128
129
130
131
132
133
134
135
136
137
138
139
140
141
142
143
144
145
146
147
148
|
package cn.programcx.springbootinit;
import cn.programcx.springbootinit.dao.MessagesDao;
import cn.programcx.springbootinit.dao.UserToUserDao;
import cn.programcx.springbootinit.dao.UsersDao;
import cn.programcx.springbootinit.model.Messages;
import cn.programcx.springbootinit.model.UserToUser;
import cn.programcx.springbootinit.model.Users;
import org.junit.jupiter.api.Test;
import org.springframework.beans.factory.annotation.Autowired;
import org.springframework.boot.test.context.SpringBootTest;
import org.springframework.core.annotation.Order;
import org.springframework.data.domain.Example;

import java.util.List;

@SpringBootTest(webEnvironment = SpringBootTest.WebEnvironment.RANDOM_PORT)
class SpringBootInitApplicationTests {
    @Autowired
    private UsersDao usersDao;
    @Autowired
    private UserToUserDao userToUserDao;
    @Autowired
    private MessagesDao messagesDao;

    @Test
    @Order(1)
    void createAccount1(){
        Users users = new Users();
        users.setUserName("Program");
        users.setEmail("noreply@programcx.cn");
        users.setPasswordHash("124aefr8rgtg");
        users.setId(1L);
        usersDao.save(users);
    }

    @Test
    @Order(2)
    void createAccount2(){
        Users users = new Users();
        users.setUserName("ChengXu");
        users.setEmail("admin@programcx.cn");
        users.setPasswordHash("12aw3ae3sf4tg");
        users.setId(2L);
        usersDao.save(users);
    }

    @Test
    @Order(3)
    void findAccountById() {
        try {
            Users users = usersDao.findById(1L).get();
            System.out.println(users);
        }
        catch (Exception e) {
            System.out.println("User not found.");
        }
    }

    @Test
    @Order(4)
    void findAccountByName(){
        Users example  = new Users();
        example.setUserName("Program");
        List<Users> usersList = usersDao.findAll(Example.of(example));
        for (Users users : usersList) {
            System.out.println(users);
        }
    }

    @Test
    @Order(5)
    void addMessages(){
        Users users = usersDao.findById(1L).get();
        Users users2 = usersDao.findById(2L).get();

        userToUserDao.insertIgnore(users.getId(),users2.getId());

        UserToUser example = new UserToUser();
        example.setUser1(users);
        example.setUser2(users2);

        UserToUser userToUser = userToUserDao.findOne(Example.of(example)).get();

        Messages messages = new Messages();

        messages.setUserToUser(userToUser);
        messages.setContent("Hello, World!");
        messages.setState(Messages.State.sent);
        messages.setSender(users);
        messagesDao.save(messages);
    }

    @Test
    @Order(6)
    void findMessages(){
        Users users = usersDao.findById(1L).get();
        Users users2 = usersDao.findById(2L).get();

        UserToUser example = new UserToUser();
        example.setUser1(users);
        example.setUser2(users2);

        UserToUser userToUser = userToUserDao.findOne(Example.of(example)).get();

        Messages example2 = new Messages();
        example2.setUserToUser(userToUser);

        List<Messages> messagesList = messagesDao.findAll(Example.of(example2));
        for (Messages messages : messagesList) {
            System.out.println(messages);
        }
    }

    @Test
    @Order(7)
    void deleteMessages(){
        Users users = usersDao.findById(1L).get();
        Users users2 = usersDao.findById(2L).get();

        UserToUser example = new UserToUser();
        example.setUser1(users);
        example.setUser2(users2);

        UserToUser userToUser = userToUserDao.findOne(Example.of(example)).get();

        Messages example2 = new Messages();
        example2.setUserToUser(userToUser);

        List<Messages> messagesList = messagesDao.findAll(Example.of(example2));
        messagesDao.deleteAll(messagesList);
    }

    @Test
    @Order(8)
    void updateAccount() {
        Users users = usersDao.findById(1L).get();
        users.setEmail("2860245799@qq.com");
        users.setId(1L);
        usersDao.save(users);
    }

    @Test
    @Order(9)
    void deleteAccount() {
        usersDao.deleteById(1L);
    }

}
|
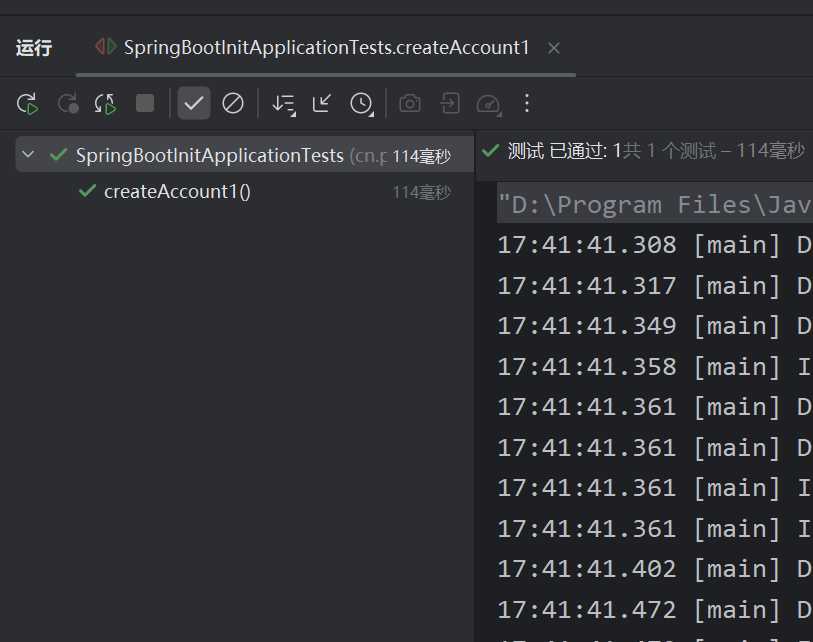
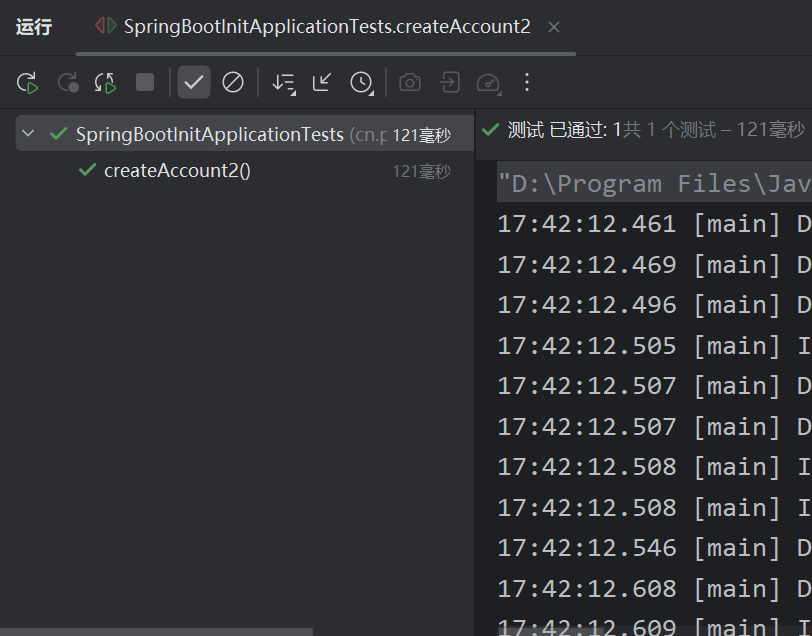
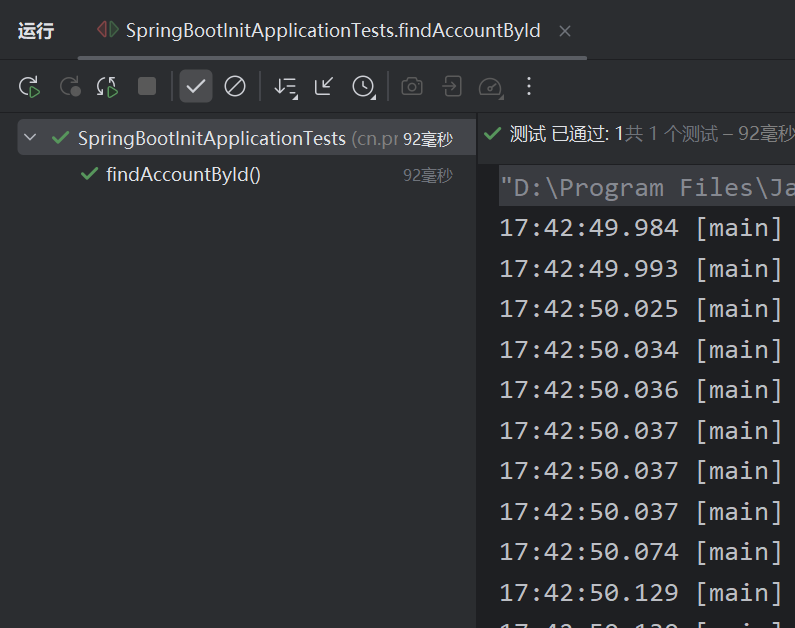
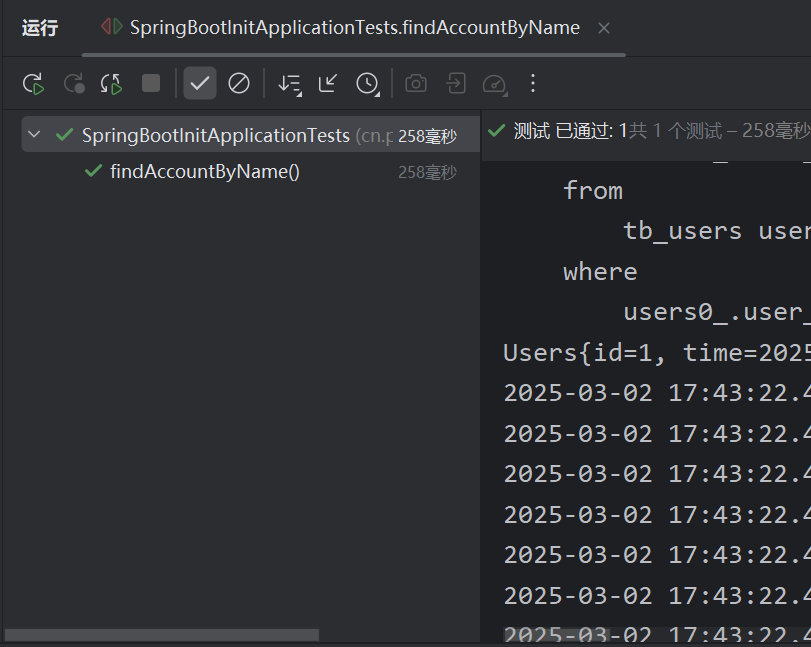
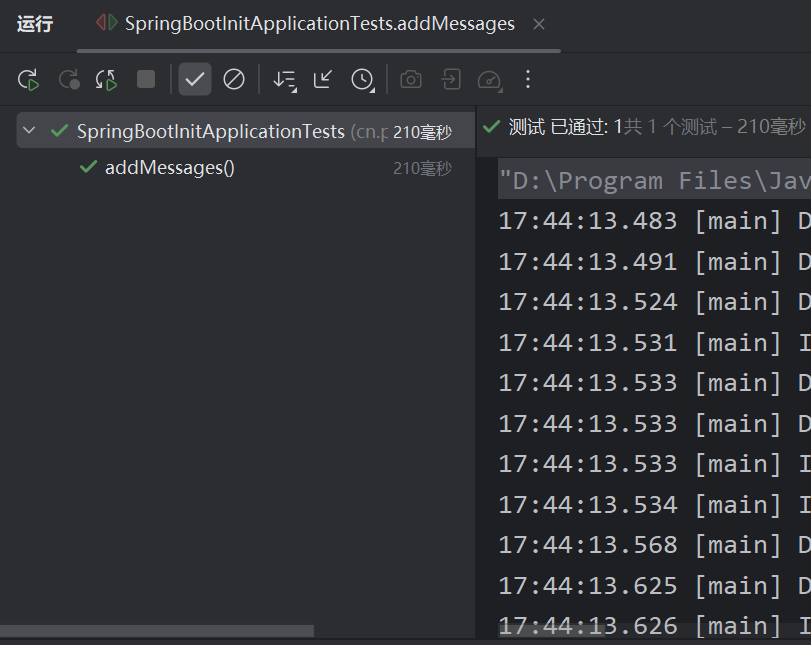
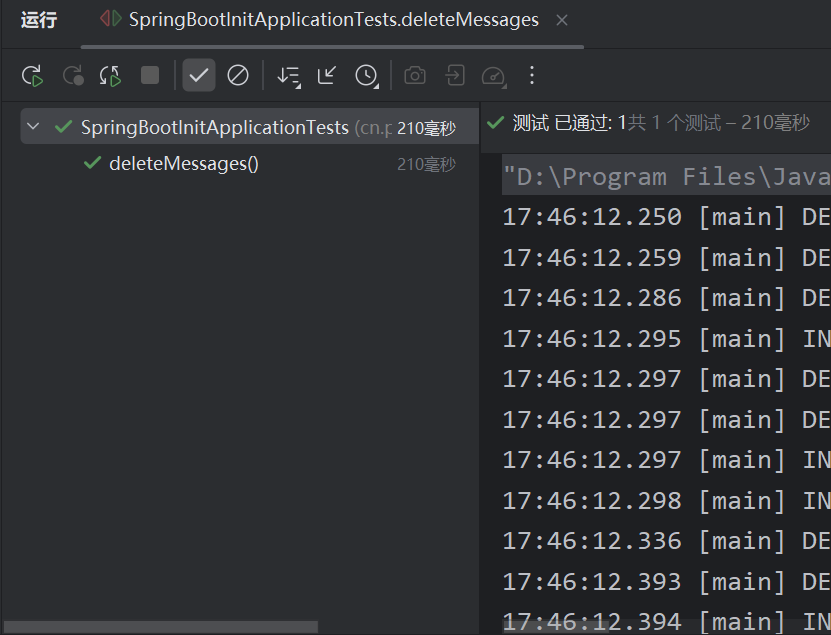
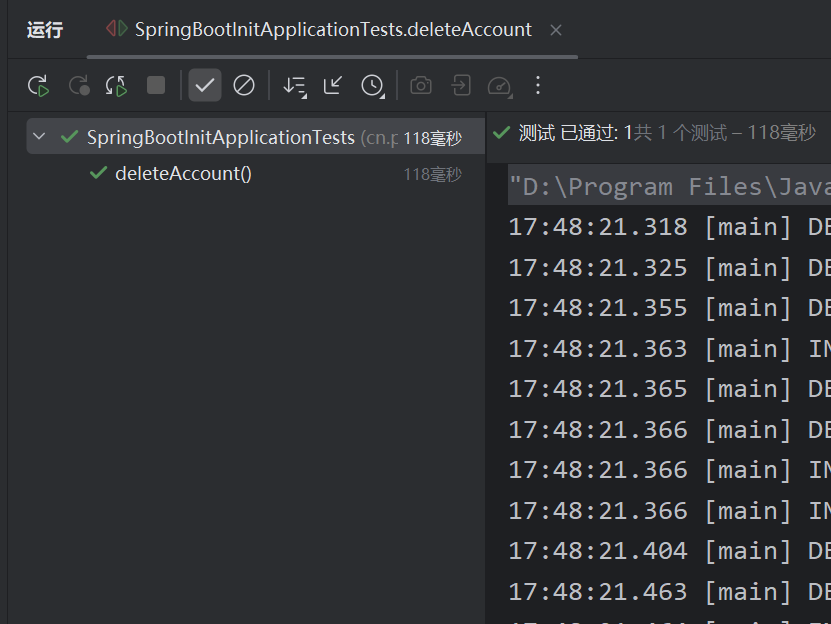
5.1.4 测试结果
依次执行测试方法,查看结果。


6.使用@Query自定义查询
我们可以使用@Query注解自定义查询,这样可以更灵活地查询数据。@Query可以在分页查询时提高查询效率。
@Query注解的属性:
value:查询语句nativeQuery:是否使用原生SQLcountQuery:在分页查询时,指定查询总数name: 使用分页查询时,指定查询名称hints:查询提示
6.1 创建Repository
创建一个MessagesDao接口,继承JpaRepository接口,添加一个自定义查询方法。
 1
 2
 3
 4
 5
 6
 7
 8
 9
10
11
12
|
package cn.programcx.springbootinit.dao;

import cn.programcx.springbootinit.model.Messages;
import org.springframework.data.jpa.repository.JpaRepository;
import org.springframework.data.jpa.repository.Query;

public interface MessagesDao extends JpaRepository<Messages, Long> {

    @Query(value = "SELECT * FROM tb_messages WHERE content = ?1 and user_to_user_id = ?2 ORDER BY created_at DESC LIMIT 1", nativeQuery = true)
    Messages findLastMessageByContent(String content, Long userToUserId);
}
|
6.2 测试
创建一个测试类,测试自定义查询方法。
 1
 2
 3
 4
 5
 6
 7
 8
 9
10
11
12
13
14
15
16
17
18
19
20
21
22
23
24
25
26
27
28
29
30
31
32
33
34
35
36
37
38
39
40
41
42
43
44
45
46
47
48
49
50
51
52
53
54
55
56
57
58
59
|
package cn.programcx.springbootinit;

import cn.programcx.springbootinit.dao.MessagesDao;

import cn.programcx.springbootinit.model.Messages;

import cn.programcx.springbootinit.model.UserToUser;

import cn.programcx.springbootinit.model.Users;

import cn.programcx.springbootinit.dao.UserToUserDao;

import org.junit.jupiter.api.Test;

import org.springframework.beans.factory.annotation.Autowired;

import org.springframework.boot.test.context.SpringBootTest;

import java.util.List;

@SpringBootTest(webEnvironment = SpringBootTest.WebEnvironment.RANDOM_PORT)

class SpringBootInitApplicationTests {

    @Autowired

    private MessagesDao messagesDao;

    @Test
    void findLastMessageByQueryAnnotation(){
        Users users = usersDao.findById(1L).get();
        Users users2 = usersDao.findById(2L).get();

        UserToUser example = new UserToUser();
        example.setUser1(users);
        example.setUser2(users2);

        UserToUser userToUser = userToUserDao.findOne(Example.of(example)).orElse(null);
        Messages messagesList = null;
        if (userToUser != null) {
            messagesList = messagesDao.findLastMessageByContent("Hello, World!", userToUser.getId());
        }

        UserToUser example2 = new UserToUser();
        example2.setUser1(users2);
        example2.setUser2(users);

        UserToUser userToUser2 = userToUserDao.findOne(Example.of(example2)).orElse(null);
        if (userToUser2 != null) {
            messagesList = messagesDao.findLastMessageByContent("Hello, World!", userToUser2.getId());
        }

        if (messagesList != null) {
            System.out.println(messagesList);
        }
    }

}
|
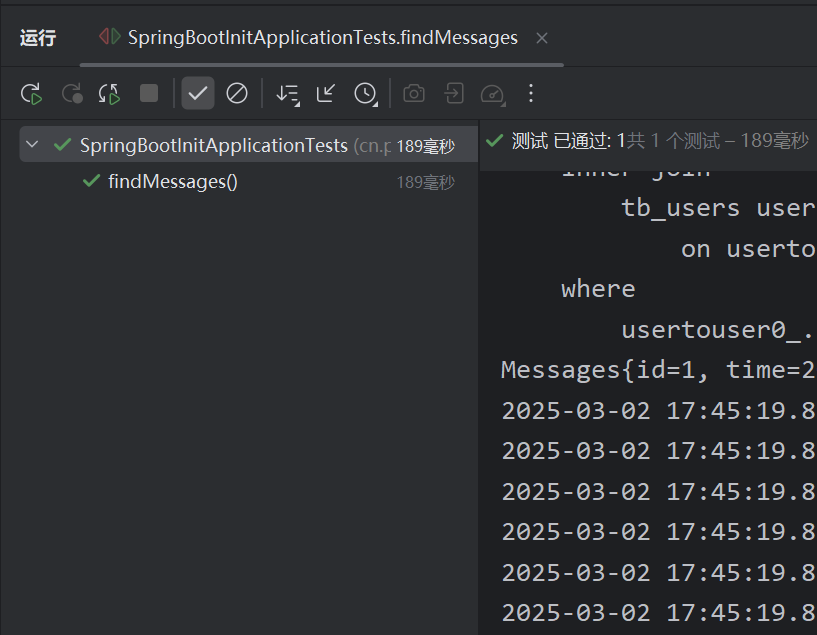
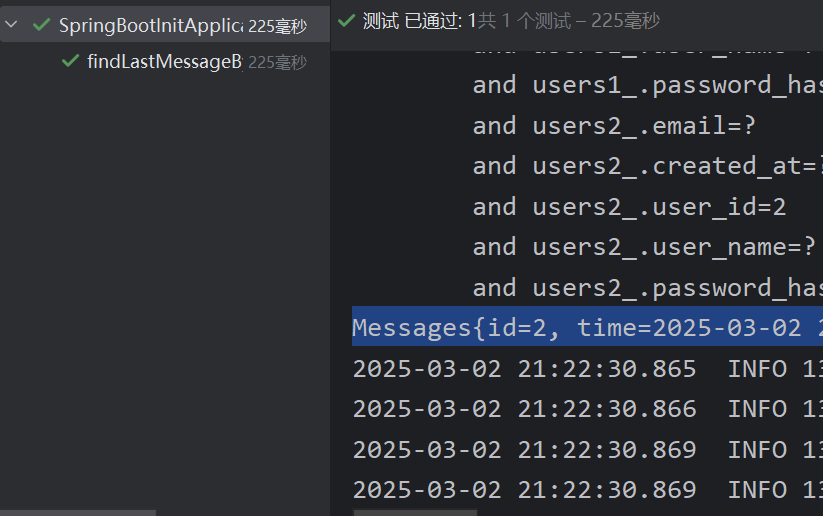
6.3 测试结果
执行测试方法,查看结果。
该文章为本人学习笔记,如有错误,欢迍指正。谢谢!
本人个人博客上该文章的链接:https://www.programcx.cn/p/spingboot-jpa/